

An Ottoman was wanted that would fit along the bottom of a bed as a linen store as well as provide a place to sit.
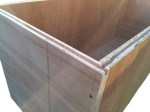
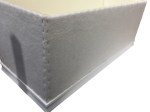
A box was made from 18mm ply with the top edges of the four sides and all edges of the lid routed with a 6mm wide and deep groove.
The box was dry assembled and the grooves extended across the corners to make them continuous.
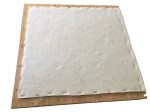
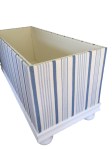
Wool guard was then added to the inside surface of the five pieces of the box. Care was taken to keep clear of areas that would be covered when the box was assembled.
Lining fabric was added over the woolguard, placing the fixings so they would not be visible when the box was assembled.

The box was then reassembled, using the holes made during the dry assembly.
Woolsafe was added to the bottom of the lid and cover fabric over that, secured in the groove.
An edge roll was stapled to the top side of the lid. Rubberised hair was inserted within the edge roll, felt added over the whole top and covered first in woolguard and then the finishing fabric which was secured in the groove.
Wood trim was attached around the sides of the base. Positions for bun feet were prepared at each corner of the base and holes for dowels drilled. Both trim and feet were painted.
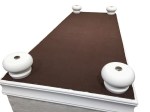
A bottom cloth was stapled to the base and holes cut where the bun feet would be fixed. Numbered feet were matched up, the dowels glued and the feet hammered home. Domes of silence were added to the feet.
Wool guard was added to the outside of the box, secured on all edges.
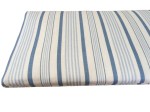
Two full widths of the cover fabric, pattern matched to the lid, were pinned inside out to the wool guard. They were sewn together following the lines of the pins.
The fabric cover was pulled down over the outside of the box. The lower edge was stapled just above the trim and the upper edge into the groove.

Single piping was glued into the groove at the top of the box and also in the groove around the lid – hiding the raw edges. Double piping was added above the trim – hiding the staples. The join in the centre of the back was covered with a wrap of fabric.
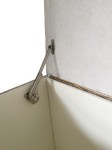
Piano hinge was cut to length and added along the top edge of the back and a soft close stay to one side.
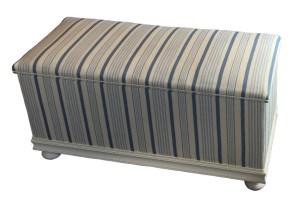
The ottoman was put in place and filled with bedding. All done!
You may be interested in other Storage Options which can be found in the Soft Furnishings section.
JBerryUpholstery has many examples of furniture Recovering and Restoration and also Soft Furnishings to add to or complement the finished items. You can see pictures of these in the Galleries – Recovering Gallery, Restoration Gallery, Soft Furnishings Gallery and Transformations.
If you have some upholstery that is in need of a bit of TLC or you are interested in Soft Furnishings then please contact us.
