

This is a long and detailed project with a lot of information an upholsterer faces. This is about the first chair tackled – Chair 1. There is a second large page – Chair 2. But….if you want the short version, here is a link to a summary page – ArmChair Pair – Summary.
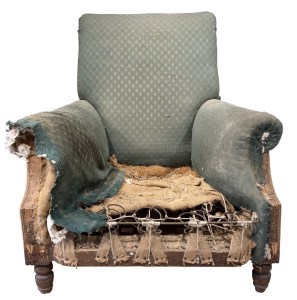

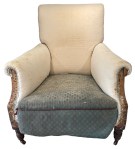
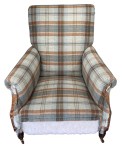
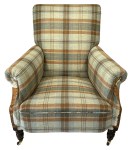
These two chairs were in need of restoration.
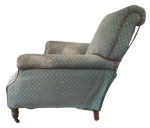
These two armchairs obviously needed new covers – and some work on just about everything else – the stuffings, webbing, springing, polish work and castors.
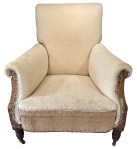
While one armchair was in it’s original dismal state, the second had already been part stripped.
Work started on the one with a complete cover. First job was to strip the fabric off of the chair.
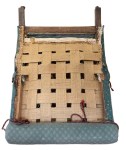
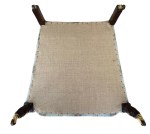
The chair was turned over and the base cloth removed. The jute webbing was sagging and clearly needed replacement.
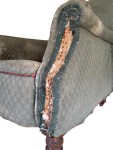
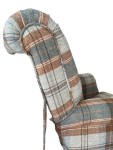
At the back, the cord was snipped free from the sides of the back noting the route it took.
The cover fabric, wadding and support hessian were removed.
The webbing over the lower half of the back was sagging and needed correcting.

The cord around the arm covers was taken off and the sewn on arm covers and wadding were removed. Fixings to adjacent pieces of fabric were removed.
The front of the outer arm could now be freed and the layers of fabric freed and lifted up.
The fixings under the arm were removed and all the layers of the outer arm removed.
The cord around the side covers of the back was snipped free, the fabric removed and the wadding pulled off.

The inner arm fabric was freed from all sides and removed. Notes were taken as to the many places it was secured to help with replacement.
The last remaining fixings for the inner back fabric were removed and the fabric cover taken off.
The cord and the seat front were sewn to the seat and continued around the side before disappearing between the arms and seat. With fixings removed, it was taken off.

The seat fixings to sides and back were removed and the seat fabric and wadding were pulled away.

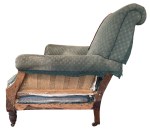
With all the fabric removed, the various corrective work could be carried out based on observations made.
Sagging bottom. The jute webbing needs to be replaced with good black and white webbing.
Sagging back. The solution is not clear. Some means to pull in the back springs is needed.
Narrow seat. Curiously the back of the seat was just 14” (35cm). Not a lot of hips would fit that! So the stuffings need to be reduced to provide 3” (8cm) or more width at the rear of the seat.

Faded, tired polish on woodworm affected legs. The woodworm needs to be treated, holes filled, stain to return colour and French polish to bring shine back to the show wood.
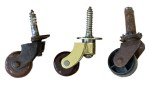
Horrid plastic castors on iron frame. The existing castors will be replaced with new brass framed ceramic castors.
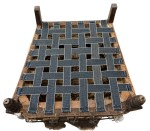
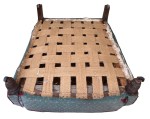
The jute webbing had sagged. No surprise there! The spring ties and the jute webbing was removed and, with judicious movements of the springs, new English webbing was added. The springs were secured to the flat webbing.
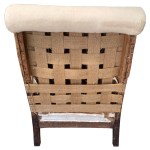

The webbing on the lower part of the outer back was sagging outwards, reducing the pressure on the lumbar support springs. The lower pieces of webbing were removed, tightened and fixed back in place.

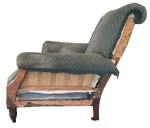
The back of the seat was too narrow for comfort and the stuffings – particularly on one side – needed to be reduced.
The calico and underlaying layers of cotton wadding and hair were removed from both sides.
The hessian cover was removed and the coir reshaped with the excess discarded. Then the whole lot was rebuilt. An increase of 3” (8cm) – adequate to accommodate most bottoms!
The legs were dull looking, with two old metal framed, brown ceramic castors at the back and black plastic castors at the front. Oh dear!
The few remaining securing screws were “extracted”, the old castors removed, the old holes plugged and new ones drilled.
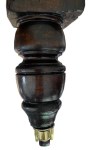

The legs were rubbed down with 0000 grade wire wool, stained and covered with some 15 coats of French polish.The final coat was rubbed down with the wire wool covered in coloured wax and buffed to a pleasing sheen.
The new castors were screwed into their new homes with securing screws added to the castor plates.
Polyester wadding was added as a barrier cloth under all pieces of fabric to comply with fire safety legislation.
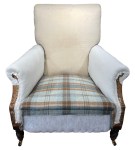
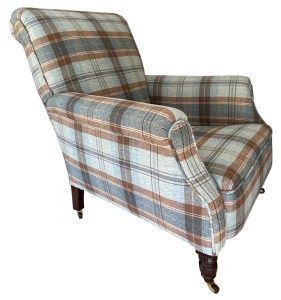
The first piece of new fabric to be added was the seat – fabric positioned with a bold line central to the seat.
Next, the two arms were covered – here each arm pattern mirroring the other.
That was followed by the inner back – pattern aligned with the seat.
Piping was sewn to the seat front fabric and the combined piece sewn to the seat fabric with the ends pulled round and behind the inner arms. The lower edge was stapled under the frame.
With the inside pieces in place the outer fabric pieces can be added to complete the chair. See the next post!
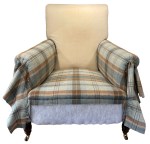
With the inside pieces of fabric added, the outside of the chair could be tackled.
The outer arms were added, starting with back tack strip under the arms with the fabric pulled down and stapled front, back and under the frame.
The arm fronts were made up with piping around the edge for the section where it could be stapled to the frame. The remainder left loose and hand sewn to the inner arm and seat front. Cotton wadding was added under the covers.
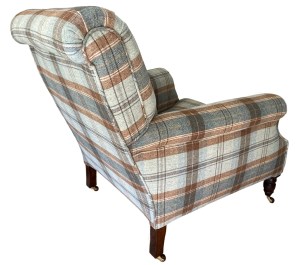
A similar approach was used for the back side covers, part sewn, part stapled in place. The piping to the back edge was kept long enough to reach the bottom of the frame. This piping was stapled down the sides of the chair.

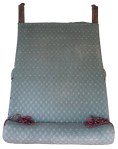
Back tack strip was used along the top edge before the fabric was pulled down, hand sewn to the sides and stapled under the frame. The fabric was folded around the legs.
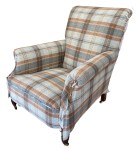
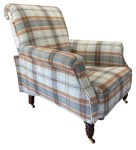
Finally an undercloth was added to complete the chair.
All done. Time to start the second chair! Due to the huge size of this page, it has been split into two – Chair 1 and Chair 2. A further page ArmChair Pair – A Summary has a much shortened version!
JBerryUpholstery has many examples of furniture Recovering and Restoration and also Soft Furnishings to add to or complement the finished items. You can see pictures of these in the Galleries– Recovering Gallery, Restoration Gallery, Soft Furnishings Gallery and Transformations.
If you have some upholstery that is in need of a bit of TLC or you are interested in Soft Furnishings then please contact us.
