

Both the Armchair Pair restoration projects were very detailed. This summary loses the details of what was done and how problems were solved but if you want to see those details click on the following links.
Armchair Pair – Chair 1 or Armchair Pair – Chair 2
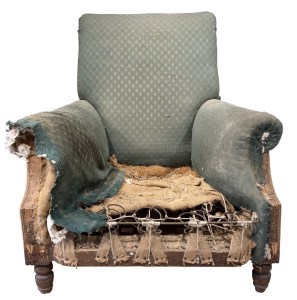

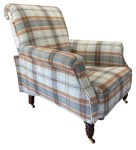
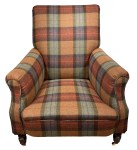
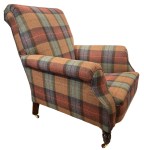
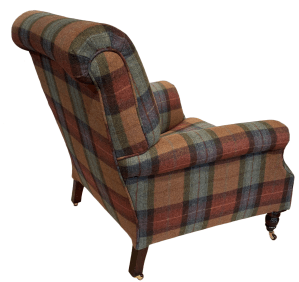
These two chairs were in need of restoration.
These two armchairs obviously needed new covers – and some work on just about everything else – the stuffings, webbing, springing, polish work and castors.
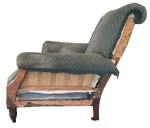
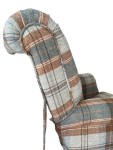
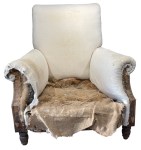
While one armchair was in it’s original dismal state, the second had already been part stripped.
Work started on the one with a complete cover. First job was to strip the fabric off of the chair, carefully observing any items needing work.
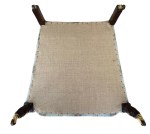
The chair was turned over and the base cloth removed followed by all of the outside pieces of fabric.

The inner pieces were then taken off and, with all the fabric removed, the various corrective work could be carried out based on observations made.
Sagging bottom. The jute webbing was replaced with good black and white webbing.
Sagging back. The lower pieces of webbing were removed, tightened and fixed back in place.
Narrow seat. The hessian cover was removed and the coir reshaped and the excess discarded adding 3” (8cm) to the width at the back.
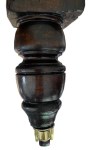

Faded, tired polish on woodworm affected legs. The legs were rubbed down with 0000 grade wire wool, the woodworm treated, the wood stained and covered with some 15 coats of French polish, rubbed down. The final coat was rubbed down, covered in coloured wax and buffed to a pleasing sheen.
Plastic castors. These were replaced with new brass fittings with brown ceramic castors.
Polyester wadding was added as a barrier cloth under all pieces of fabric to comply with fire safety legislation.
The first piece of new fabric to be added was the seat – fabric positioned with a bold line central to the seat. Symmetry and precision are key!
Next, the two arms were covered – patterns mirrored. Then the inner back – pattern aligned to the seat. With piping added, the seat front was attached.
With the inside pieces in place the outer fabric pieces can be added to complete the chair.

The outer arms were added, then the arm fronts.
The back side covers, were added followed by the outer back.
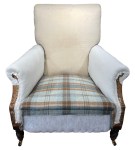
Finally an undercloth was added to complete the chair.
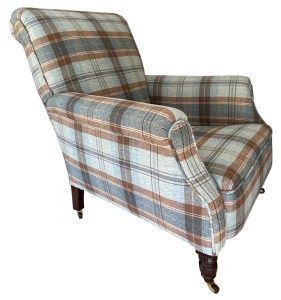
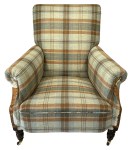
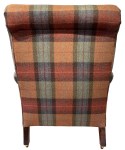
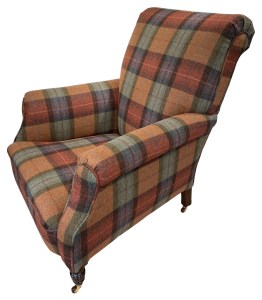
All done. Time to start the second chair!
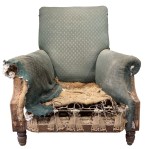
This is the second of the pair of armchairs. It started in a pretty poor state – but finished up looking a whole lot better!
First task, like the first chair, was to remove the remainder of the cover and see what needed work.
Issues to solve were similar to the first chair of the pair – narrow seat, sagging bottom, dull polish and a need for new castors. One extra problem was that the seat needed to be rebuilt.

The seat was widened and the webbing replaced before the hessian cover of the seat was removed.

The broken laid cord holding the springs in place was replaced.
A hessian spring cover was added, then a layer of coir, more hessian, then hair and these new stuffings were covered in calico.
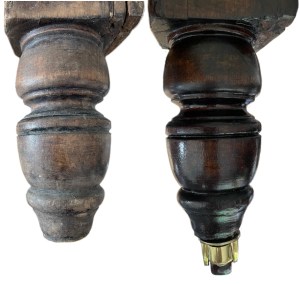
The legs were stained and polished and new castors added.
Polyester wadding was added as a barrier cloth under all pieces of fabric to ensure the chair conformed to current fire safety legislation.
The fabric for the seat, inner back, inner arms, seat front and arm fronts was added – with, as always, an eye on symmetry!
The outer arms were added and then the side covers for the back.
The fabric was folded and secured around the legs. A new undercloth was tacked on, completing the second chair of the pair.
This was just a summary page. If you want to dig deeper go to one of the detailed pages using the links below.
Armchair Pair – Chair 1 or Armchair Pair – Chair 2
JBerryUpholstery has many examples of furniture Recovering and Restoration and also Soft Furnishings to add to or complement the finished items. You can see pictures of these in the Galleries– Recovering Gallery, Restoration Gallery, Soft Furnishings Gallery and Transformations.
If you have some upholstery that is in need of a bit of TLC or you are interested in Soft Furnishings then please contact us.
