


Two Art Deco oak chairs from the 1930s needed new covers.
The chairs had already been stripped but a few photos remained as clues to the original shaping.
The frames were in great shape. The scuffs and water marks were tidied up.
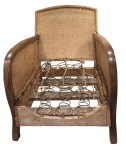
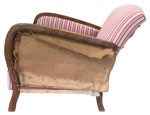
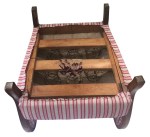
Both chairs had some pieces of hessian left with stiff rolls of straw sewn on to some edges.
Springs were attached to both frames and one still had some springs ties – a key element of detail.
The old broken spring ties were removed with notes taken, particularly of the curious secondary cords tied to the front springs.
New cord was added across the chair springs – tying to each side of each coil. These cords shaped the top of the seat.

Then cord was stretched across the front to act as a target for the front springs and form the front of the seat.
Cords were run to the front, pulling the fronts of the springs forward close to the stretched cord, and with the addition of the second cord, to just touch the horizontal stretched cord.
The fronts of the springs were lashed to the stretched cord to keep them in place.
The sequence of adding the stuffings and covers needed careful consideration. The seat was tackled first.
Hessian was added to the frame and tied to the spring tops.
Coir was added over the hessian and tied down.
A second layer of hessian was added, sewn at the front.
Hair was added over the hessian and tied down.
Finally a calico layer was added.
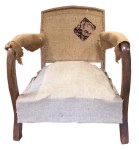
The same sequence used to add the seat stuffings was followed for the back.
First a layer of coir was secured to the back hessian.

The coir was covered in hessian and then the hessian was covered in hair.
Calico was added over the hair.
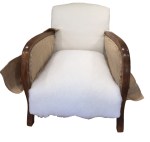
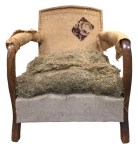
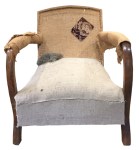
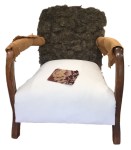
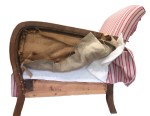
The original arm hessian was rolled down and secured to the inside of the arms. Coir was added and new hessian secured over the top – left loose at back and bottom.
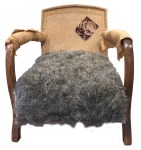
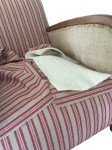
FR polyester wadding was added to the seat and the cover fabric added.
The seat fabric was pulled out at the side and trimmed.
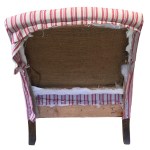
Similarly fabric was added to the inner back.
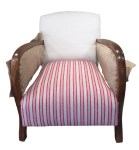
With no tack strip available, the cover fabric for the arms and an underlayer of woolsafe, was secured at the side of the seat.
These were pulled up and secured to the top and front inside of the arms, first the woolsafe and then the cover fabric.
This was repeated for both arms, taking care to match the pattern on both sides.
The two hessian layers of the inner arm, still loose at the bottom and back edges, were secured over the top of all the other layers, holding the coir in place.


The outside of the arm was covered – first a layer of hessian, then FR wadding and finally the cover fabric.
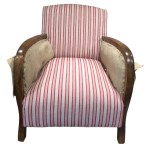
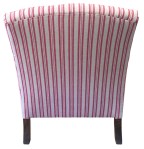
With both arm covers complete, double piping was added. To fit with the striped pattern, the piping was made from fabric cut straight across the width, rather than on the bias.
The inner arm piping passed through to the back, while the outside piping ran over the back of the arm before it too passed out to the back and was secured.

The outer back could now be added. The same sequence was followed – hessian, wadding, cover.
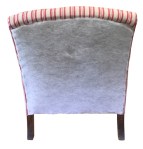
The cover was hand sewn in place, cut and folded around the back legs.
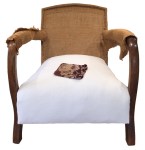
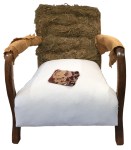
Before the undercover was added to one chair, a piece of original fabric was attached to the frame – something interesting for a future upholsterer to wonder at.
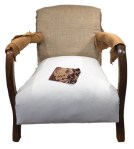
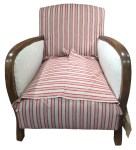
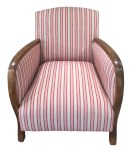
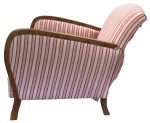
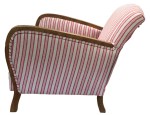
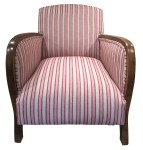
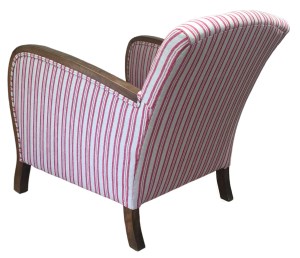
With both chairs complete and with near identical appearance of shape as well as positioning of the cover fabric, they could be returned to their owner.

JBerryUpholstery has many examples of furniture Recovering and Restoration and also Soft Furnishings to add to or complement the finished items. You can see pictures of these in the Galleries– Recovering Gallery, Restoration Gallery, Soft Furnishings Gallery and Transformations.
If you have some upholstery that is in need of a bit of TLC or you are interested in Soft Furnishings then please contact us.

