


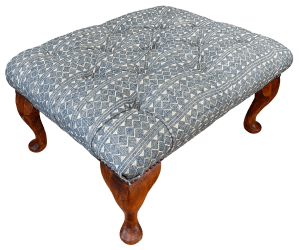
This Chesterfield stool needed a new cover and reworking of the internal support for the buttoned and pleated top.
Stools are limited in scope – for the most part, four legs and a top. But the way they are constructed varies immensely. For example, the Large Stool had a plain top, box type construction, screw on legs and foam padding. For comparison, while this Chesterfield Stool also had foam padding, it had a buttoned and pleated top, a framed base with attached legs. While both are called “stools”, the pair stand as a demonstration of the variety of possibilities for furniture!
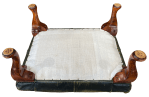

With the stool on it’s back, the under cloth was removed, showing pads of foam.

The foam was pulled out. Behind that was some worn out hessian with metal discs with metal strips coming out of the centres and folded to the sides. The metal strips were the back of the buttons, holding them in place. The metal strips were straightened and the buttons removed.

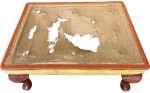
The fixings for the leather top and the nailing to the sides of the legs was removed. That allowed the top to be pulled free, revealing the green foam pad.
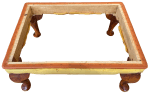
The green foam was removed which in turn allowed the worn hessian to be taken off.
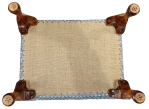
New hessian was added – this will support the foam pad and provide an anchor for the buttons.
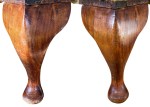
The opportunity was taken to rub the legs down, stain the abraded areas and add new polish.

The original green foam was fixed back in place and covered in polyester wadding, ready for the new cover.
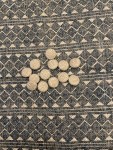
Buttons were made up, covered in plain fabric taken from the cotton print fabric.
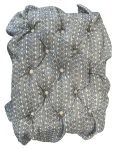
The fabric was placed on top of the stool and the buttons threaded through the wadding, foam and hessian and secured and anchored behind the hessian. A great deal of effort was made to ensure that the buttons were equally spaced and symmetrically placed.

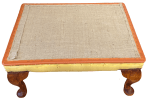
The sides of the fabric were fixed to the frame and the pleats set in place to complete the button work.
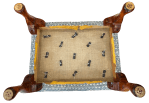
The button ties were backed with small rolls of webbing to ensure they did not pull through. A hessian undercloth was added.

Lines of close nailing were added to the tops of the legs to complete the project.
This is just one of the stools featured in the constantly growing collection of projects.
JBerryUpholstery has many examples of furniture Recovering and Restoration and also Soft Furnishings to add to or complement the finished items. You can see pictures of these in the Galleries– Recovering Gallery, Restoration Gallery, Soft Furnishings Gallery and Transformations.
If you have some upholstery that is in need of a bit of TLC or you are interested in Soft Furnishings then please contact us.
