


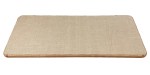
This Finn Juhl, Japanese Collection, two seater sofa, needed some work to make the seat firmer. A matching stool also needed restoration work to firm up the seat and replace the damaged under cloth.
The slightly faded and stained fabric will be replaced with an identical fabric, so the end result will be that this sofa will look just as it did sixty or seventy years ago.
However, while the feel will also be like the original – much improved from today – that will not be visible!
If you would like to find out more about this famous Danish designer then click this LINK. These collectors items can also still be bought.
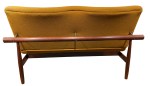
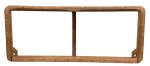
This precisely engineered sofa had an interesting construction.
Three long bolts held the back in place through the back wood and metal spacers.
A further three very long bolts passed through the lower frame, the seat and secured the bottom of the back in place.

With these removed, the back could be lifted free and the seat, now only held in position with two wooden pegs, was also lifted away.
With the sofa dismantled, it was time to strip the cover and stuffings from the seat frame.

The undercloth, held with staples, was removed. The holes that the wooden plugs had been in were circled with a further eight staples.

Notes were taken of the seat centre strut emerging through the undercloth.
The folds at the corners of the cover fabric were noted and will be recreated when the new fabric is added. The fixings were removed and the fabric pulled free.

The yellow foam under the cover fabric was also stapled – and that was freed and removed. The green foam pad under the yellow foam was also removed.

This left some old, sagging and hardened Pirelli webbing which was removed to leave the bare frame.
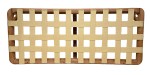
The decision was made to use Pirelli webbing to replace the old. Marks and tack holes on the frame suggested the original webbing may have been a more traditional webbing.
A layer of hessian was added over the webbing to better support the stuffings.

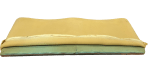
The old but serviceable green foam layer was then fixed back in place.
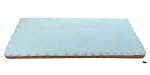
New foam was added. This thin layer will provide a little more ‘give’ to the finished sofa.

The original yellow foam was also reused.
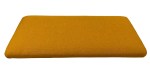
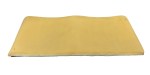
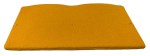
New cover fabric – identical to the original – completed the top. The corner pleats were made in the same way as on the original cover.
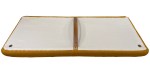
A new canvas undercover – similar to the original was added underneath.


Care was taken over the detail – the holes for the legs and around the frame cross piece.
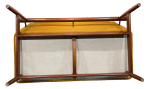
With the seat completed, the sofa back could be tackled.
The back needed a new cover on both sides and the existing webbing was a little loose.
First the back fabric was removed.
Then it was turned over and the front fabric removed.
The yellow foam and the green foam layers were folded back to allow access to the webbing which was tightened.
The new cover fabric was added to the front keeping the tension in the fabric so that the gentle curves of the frame were followed.
Finally a new cover was added to the rear of the sofa back.
With both seat and back having their new covers, the sofa could be reassembled.

First, the seat was pushed down onto the frame with legs sliding firmly into the precisely cut holes for the legs.
With the sofa back carefully positioned, the long bolts were pushed up through the frame, through holes in the seat and into the back where they were screwed into the fixtures in the back.


Three more bolts were pushed through the frame at the back, through long brass spacers and engaged in more fixtures within the back frame and tightened up.
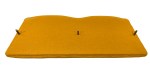
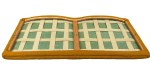
This superbly engineered sofa seems to float above the frame that holds it. This image from above emphasises the lightness of the design.
This two seater sofa was accompanied by a matching stool, also by Finn Juhl. You can see the details of that Restoration project here.
JBerryUpholstery has many examples of furniture Recovering and Restoration and also Soft Furnishings to add to or complement the finished items. You can see pictures of these in the Galleries – Recovering Gallery, Restoration Gallery, Soft Furnishings Gallery and Transformations.
If you have some upholstery that is in need of a bit of TLC or you are interested in Soft Furnishings then please contact us.
