


This chair needed a lot more than a new cover. None of the old upholstery could be used – so this was clearly a restoration project.

First, all remaining upholstery was examined for what was there and what had since gone – and recorded.
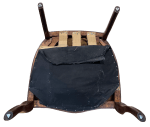
The chair was then tipped over and the remaining fixings for the under cloth removed.
The old sagging webbing was taken off and the springs were carefully removed.
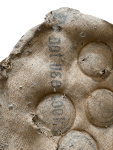
The old and torn spring cover was reused sacking that had mysterious characters printed on it.

The sacking and overlying stuffings were removed and discarded.
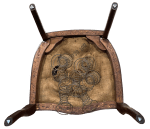
The pieces of fabric on the oval back were also removed. Time to rebuild.

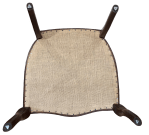
New webbing was added, springs attached and held with laid cord.


A new spring cover was added, and the springs tied to it.
It was noted that the base of the back had many old tack holes – and would have to be covered.

A thick layer of coir was attached on top of the spring cover, covered in hessian and a rolled edge stitched.
The top of the seat was pulled down with through stuffing ties and covered with horse hair before a barrier cloth cover was added.


A hessian support cloth was added to the back – both inside and outside. Both of these areas and the seat were all covered in a barrier cloth.

A separate piece of fabric was added over the damaged area of the back.
Cover fabric was then added to the seat, inner and outside back.
An undercover was added now – although, as no cover fabric folded underneath, this could have been added at any time after the springs were added.
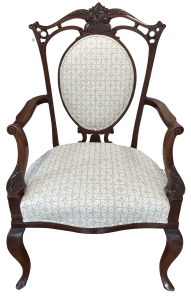
The final step was to edge all three areas with double piping. The ends around the oval back pieces were covered with buttons.


JBerryUpholstery has many examples of furniture Recovering and Restoration and also Soft Furnishings to add to or complement the finished items. You can see pictures of these in the Galleries – Recovering Gallery, Restoration Gallery, Soft Furnishings Gallery and Transformations.
If you have some upholstery that is in need of a bit of TLC or you are interested in Soft Furnishings then please contact us.
