

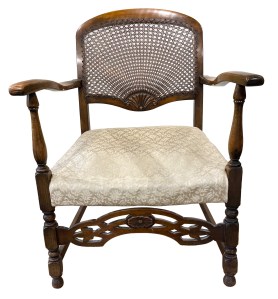
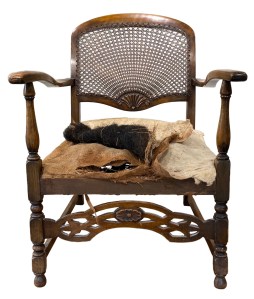
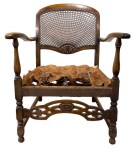
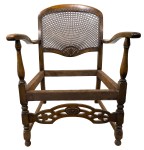
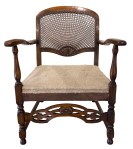
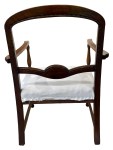
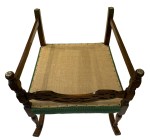
The name of this project is a bit of a misnomer. While it starts out with a lovely rattan back, it does not finish up that way! This is the last chair of a three piece set – two were thrown out a while ago. Let’s hope this one stays the test of time!
This chair, with a delightful rattan back, needed a complete replacement seat with new rolled edges. Traditional methods and materials were used.
The rattan back, while beautifully made, was brittle with age and could not be kept. Instead of adding new rattan, the back was replaced with a new upholstered pad made with traditional materials.
The wood had smears of paint and some areas had lost some colour.
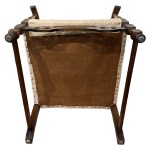
With the chair on it’s back, the existing cover was removed.
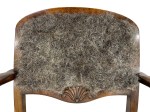
That left an older cover with a very sad appearance.
Clearly, this is a ”crushed rolled edge”.


The chair was laid down again and the fixings for the undercloth and second cover removed, revealing some old sagging webbing.
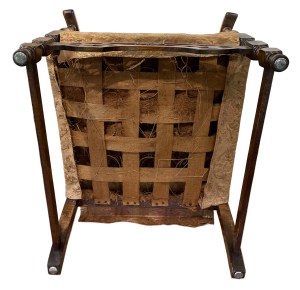
There were springs in there too – hard to see with the dusty remnants of coir covering them.
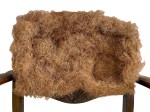
This was just a start. There were far more layers of stuffings and fabric than expected to be peeled away.
With the chair upright again, the second cover was pulled away.
Layers of calico, hair and then coir (most of which had crumbled to dust) were cleared off.
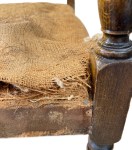
Remnants of a rolled edge covered in hessian in a corner gave some indication of the original height for the rest of the seat. Definitely crushed!
Surprisingly, under the hessian were more layers of hair and coir (more dust). These must have predated the previously removed stuffings.
A final layer of hessian was left covering some springs. The hessian was removed and the springs lifted off the webbing.
Finally, the webbing was removed and the frame cleaned up.
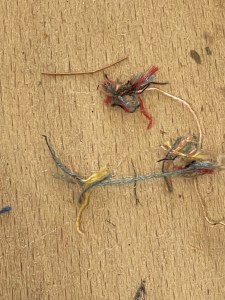
A few brightly coloured tufts of fabric – unlike anything else that had been removed – were found under the webbing. Their origin and how they came to be in such an inaccessible place will remain a mystery.
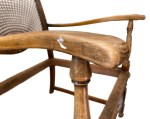
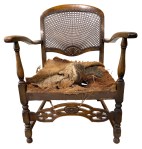
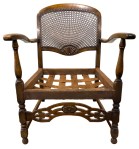
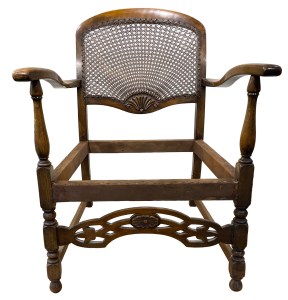
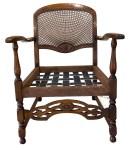
With the frame clear of fabric, it was time to create a new seat with rolled edges on all four sides.
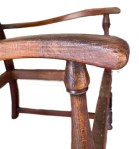
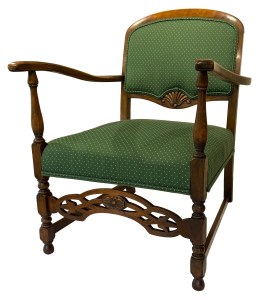
First, the polish work was tidied up and colour returned to the faded areas. The removal of the dust from the pierced work at the front improved the appearance.
New webbing was added to the frame.
The original springs – front three slightly longer than the back six – were attached to the webbing.
Laid cord was used to tie in the springs before a hessian cover was added.

A layer of new coir was attached to the hessian.
A rolled edge was made using three lines of hand stitching pulling the coir into shape, with the same height, along all four sides of the seat.

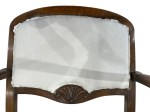
Hair was added over the top and covered in calico. The seat was now ready for it’s new cover.
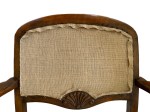
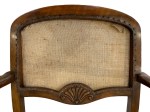
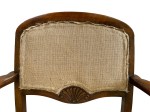
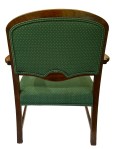
While this story is primarily about the seat, the back was also worked on – the rattan was removed and a new back, also with a stitched edge was constructed.
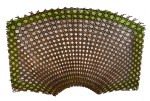
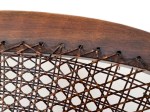
At this time it was decided that the wonderful but breaking rattan work should be removed.
The rattan was edged with masking tape and carefully cut out with the intention to frame it as a memory of this chair – the last survivor of a three piece set.
The rather bare looking chair was turned around and a hessian support sheet added – following the outside line of the holes that had held the rattan.
The chair was turned around again.
Another layer of support hessian was added – again just covering the holes.
That was covered in a layer of coir.
Hessian was attached over the coir and a single line of stitching made to better define the edge and raise it slightly.
Hair, for softness, was added to the top.
Calico was added over the hair followed by polyester wadding for fire safety.
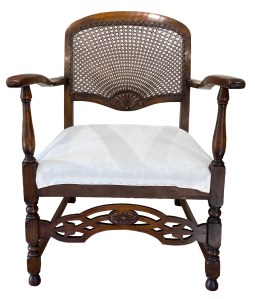
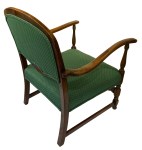
This chair now has a new seat with rolled edges on all sides and a new back replacing the delightful but sadly old and breaking rattan work. With all areas covered in calico, the chair is ready for a new cover.
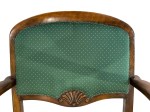
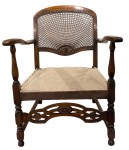
The inner back, outer back and seat were now covered in wadding before the cover fabric was added.
Cover fabric was attached to the inner back, outer back and then the seat.
An undercloth was added.
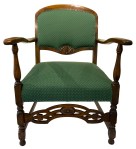
Double piping was made and attached around the edges of the inner and outer back, covering the raw fabric edges – the joins covered in a wrap of fabric.


More sections were added to each of the sides and this completed the project – time to return to the owner!
All done!
JBerryUpholstery has many examples of furniture Recovering and Restoration and also Soft Furnishings to add to or complement the finished items. You can see pictures of these in the Galleries– Recovering Gallery, Restoration Gallery, Soft Furnishings Gallery and Transformations.
If you have some upholstery that is in need of a bit of TLC or you are interested in Soft Furnishings then please contact us.
