

A previous Tub Chair project turned a pale canvas covered chair into a flamboyant, flower covered delight.
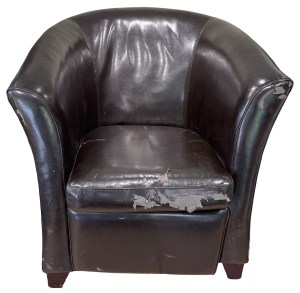
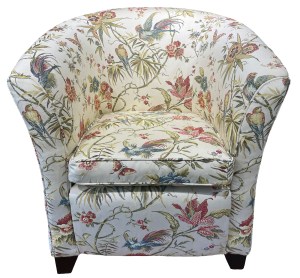
This project sees a dark leather covered Tub Chair turned into a flamboyant, bird covered delight.
The seat had collapsed and needed restoring.
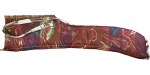
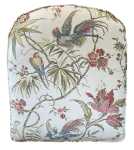
The new fabric was a brocade – an embroidered fabric with bold patterning. The main visual elements were the birds – one set central to the fabric and the other set divided at the two fabric edges. Effort was applied to keeping the birds on as many pieces of the fabric as possible.
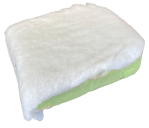
The loose cushion – with hook and loop on the bottom side to keep it in place – was removed and the pad pulled from the cover. Polyester wadding had been glued to the top side. More wadding on the other side will be needed to make the cushion in it’s new cover reversible.
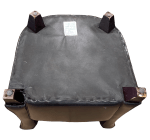

The chair was tipped onto it’s back and the four legs unscrewed. The damaged corners will need attention.
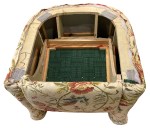
The bottom cloth was removed – along with a massive number of dehydrating beads which had fallen out of a bag inside the seat base.
With the beads vacuumed up, the seat base was unscrewed. Of the six screw positions, one had no screw, one screw missed the frame (so did nothing), one screw had broken through the wood frame and the screw behind it had sheared off completely – only two actually remained to secure the seat! On the rebuild, replacement screws will be needed to firmly secure the seat base in its correct position.
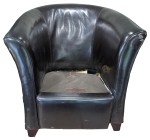
The leather was then removed from the seat and back.
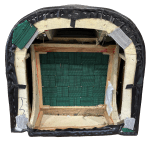
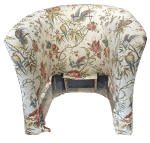
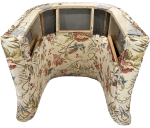
With the tub chair stripped, recovering could begin.
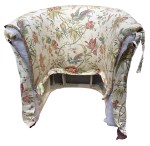
The inside of the chair was covered with three pieces of fabric, sewn together to make one piece. Each were shaped so that the lower edges just fitted to the bottom of the frame, while the top edges were much longer and fitted to the top.

The cover was placed on the chair, then stapled in place, top and bottom.

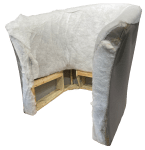
Piping was added around the top of the back before wadding was added to ensure conformance to current fire safety legislation.
The back cover was made from two pieces of fabric sewn together, pattern matched at the seam.
The cover was slip stitched along the top and stapled at the bottom while being pulled to conform to the curving sides of the chair.
With the inside and outside covers added, it was time to add the arm fronts – the topic of the next post.
At the front, the outer and inner covers were loosely pinned in place and needed covers.

Two pieces of fabric were cut out, shaped to fit the two arms, selecting birds near the tops.
Piping was sewn to them, stopping where the seat would eventually fit. Polyester wadding was pinned to the back.
The arm fronts were slip stitched to the chair.
For the lower part of the inside – the part the seat will fit alongside – the piping was turned so that the fabric could be stapled to the frame, while the piping continued down, sewn to the arm cover.
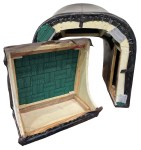
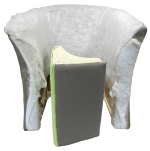
The seat, which had broken fixings needed a new cover before being attached firmly to the frame.
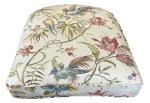
The seat was covered in wadding before a single piece of fabric was attached to back, front and sides.
The chair was turned on it’s back and the seat secured with six screws, this time all firmly embedded in the frame.

The under cloth was added. The screw holes for the legs were marked with pins. Once the undercloth was in place, the pins were removed and a cross cut in the cloth as the marker.

The sprayed finish on the legs had suffered quite a lot of damage and the pale wood exposed was very noticeable. To reduce this, stain was applied to darken the wood, making the damage much less noticeable.
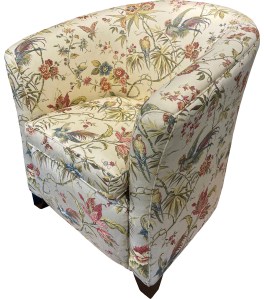
The legs were screwed back on to complete the tub chair, just a cushion needed to complete the project.
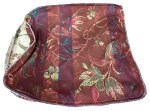
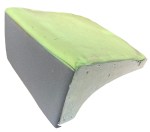
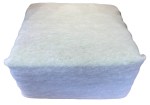
The cushion had originally been one sided – the lower side attached with hook and loop tape to the seat. To allow the cushion to be reversible, new wadding was added to the underside to match the existing wadding on the top.
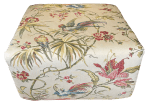
The fabric pieces for the cushion cover were cut out – matched pieces for top and bottom. The zipped gusset was made up, fitted with piping on both edges. When the cover was complete the fraying edges were overlocked, the cover inverted and the pad inserted.
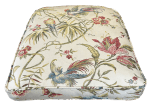
Although unnecessary, the two sides of the cushion matched – the changed gusset gives the game away!
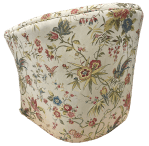
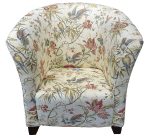
The chair was turned right way up and the cushion placed to complete the project.
JBerryUpholstery has many examples of furniture Recovering and Restoration and also Soft Furnishings to add to or complement the finished items. You can see pictures of these in the Galleries– Recovering Gallery, Restoration Gallery, Soft Furnishings Gallery and Transformations.
If you have some upholstery that is in need of a bit of TLC or you are interested in Soft Furnishings then please contact us.
