


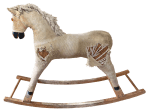
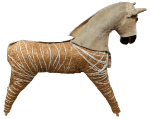
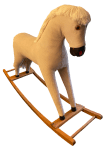
This Rocking Horse, Dobbin, needed a new coat! It appears fabric covered rocking horses were made in the second half of the 20th century mostly in Germany and England.
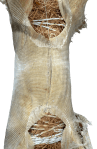
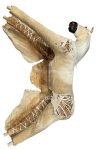
While his fabric coat was tatty, structurally he was still in good condition.
Dobbin arrived with no tack at all and his tail had fallen off. Fortunately the metal parts – stirrups and bit – and the tail had been kept.
A new saddle, bridle and all the tack will be made, as will a replacement tail and mane, for the project to be completed.
The rockers had areas where the colour had faded but generally had suffered only a little wear and tear. They will need restoring.
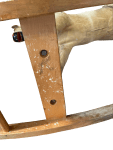
First task was to remove the rockers, screwed onto Dobbin’s hooves.

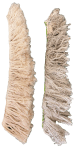
The tail had originally been held in place within a fold of the fabric. The tail that had been kept was made from a bundle of cord, tied in the centre and some 30cm long.

The positions of the eyes and ears, details of the mane and tail were recorded so that everything would be a similar size and correctly positioned.

Working along the back, the stitching was cut through from tail to the mane.
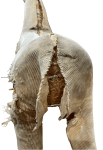
Underneath Dobbin there were three patches – two between the pairs of legs and a third at the throat. The two patches between the legs were removed.
The centre seam running between these two areas, slip stitched in place and held with thread to the front, was cut through.
The seams running down the legs were slip stitched and held in place with nails.
The stitching was cut through, releasing the fabric wrapping the leg. Then the nails were removed leaving the fabric free.
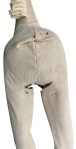
A large nail held the fabric in place at the back end of Dobbin. Once removed, the machine stitched seam running along the back was cut.
The fabric just in front of the neck and normally hidden by the tack, was also held with a nail.
With that removed the machine stitched seam running around the neck could be opened and the side pieces of fabric could be removed.
The head was now tackled. First the centre seam holding the mane was carefully opened and the mane removed.

A nail at the muzzle was removed and the machine sewn centre seam cut through.
The two eyes, originally held with a clip, were glued in place over eye sockets. The glue and fabric was cleaned off.
The ears were nailed in place – they were removed and the nail holes marked for the recovering.
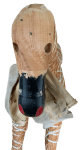
Under the neck, a small glued patch was pulled away. Nails along the slip stitched seam were removed, the thread cut and the pieces of fabric on either side of the head taken off.
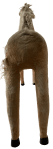
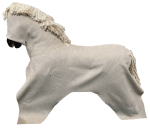
Looking very bare, Dobbin was ready for his new coat.
Macrame cord – similar in nature to that used for the original tail and mane – was used for their replacements.
For the mane, a piece of calico, the same length as the original mane and twice as wide was cut out.
Pieces of cord were cut to match the width and glued down the centre line.
When the calico was completely covered a line of stitching was run down the centre line. The calico was then folded over and another line of stitching run down the fold. The excess calico was trimmed off to leave just the mane.
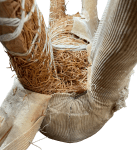
After some shaking, the cord started to unwind leaving the new mane looking quite like the original.
Using the original pieces of fabric as templates, fabric for the head was cut out from the corduroy.

The two pieces were sewn together with the mane caught in the seam. The front was kept 15cm from the muzzle edge as in the original.

Pieces of cord, twice the length of the original tail were taken and tied with thread in their centres to make the new tail.
The two body pieces of fabric were cut out. These were machine sewn from where the tail will be and the junction with the head. Then the seams between the head pieces and body pieces were sewn, leaving around a third open.
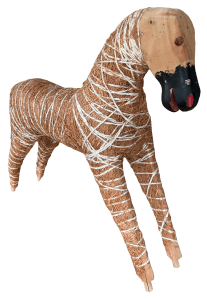
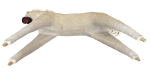
The combined assembly was then carefully placed over Dobbin and tugged into place.
During the fitting process that followed, the fabric was cut so that it followed the contours of the body and legs. Excess fabric was trimmed as progress was made.

The new cover was pulled down the legs and temporarily secured. With the horse upside down the seam along the belly was slip stitched in place.
The fabric was folded around the legs and the inward facing edge stapled in place. The other edge was folded and slip stitched to the fixed side.
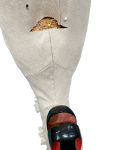
The ends, which the hoofs would rest against, were secured, adding a little padding to puff out the bottom. The hoof was tried against the end to check the junction looked good.

At the rear end, the centre seam along the back was extended towards where the tail would be. The fabric was folded and the tail tucked under, hiding the end, and secured. The folds were stitched to hold and the centre seam completed down between the back legs.
At the head end, the seam forward of the mane was extended with pleats made as the seam turned down towards the muzzle. The seam was then extended down to the muzzle where the fabric was trimmed and stapled in place – these fixings will be covered by the tack.

The seams between head and body were extended forward, ultimately joining the centre seam running from the neck down to between the front legs.
The fabric was pulled around the muzzle with gimp pins holding the back join. A short seam was stitched behind the head.
The fabric at the locations of the eyes was cross cut with glue inserted into the holes and the eyes pushed into place to hold.
With the horse on it’s back, three gaps were covered with pieces of fabric – a small one under the neck was glued in place, the two between the pairs of legs slip stitched in place.
The rocking horse was replaced on the newly stained and oiled rockers.All parts were sanded down, a light stain (light oak) was applied to return colour to the wood and sealed with several coats of mineral oil.
New ears were made from two pieces of fabric sewn together, inverted and folded around a piece of shaped stiffener.

They were temporarily attached to the head. Looking good.
The owner provided newly chromed stirrups, the original bit and rings and some of the old tack plus the saddle. However, new tack would have to be made!
Some researching was done to confirm the names of the pieces of tack as used on real horses.

Using the saved pieces, the dimensions and make-up of the tack was determined. Rings to replace those at the front and also hold the girth in place were sourced.
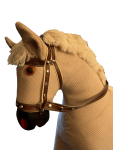
The pieces around the head were made first. A nose band wrapped around the muzzle, the head band crossed the front of the head above the eyes and finished behind the ears. The headstall and bridle joined and passed over the top of the head, covering the back of the ears and the ends of the headband. Reins were also made, looped to the rings of the bit.
The pieces for the body were then completed. The saddle was made up of a brown seat edged in contrasting cream and attached to an under saddle. Side pieces were riveted to the under saddle with the girth and stirrup leather passed through and also secured with rivets. The stirrup leather was looped through the freshly chromed stirrups. The girth was looped through two rings – these will hold the other end of the girth in place when it is pulled tight around the body. This construct was put on one side while the remaining pieces were made up.
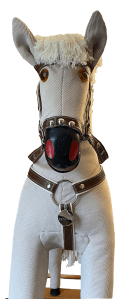

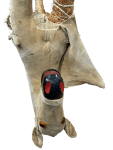
Three pieces were looped around a ring that will sit at the front of the neck. A metal name tag was also added. Two of the pieces ran around the neck and secured where they will be hidden under the saddle. The third piece, the martindale, had a loop added which the girth will pass through. A crupper was made passing under the tail and the ends secured under the saddle position.
Finally the saddle was put in place, the girth passed through the martingale and tightened using the rings.

A very pleasing result.

JBerryUpholstery has many examples of furniture Recovering and Restoration and also Soft Furnishings to add to or complement the finished items. You can see pictures of these in the Galleries – Recovering Gallery, Restoration Gallery, Soft Furnishings Gallery and Transformations.
If you have some upholstery that is in need of a bit of TLC or you are interested in Soft Furnishings then please contact us.
