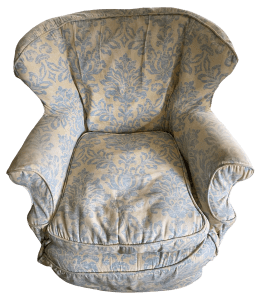
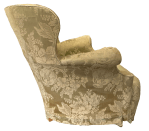
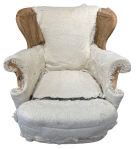
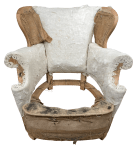
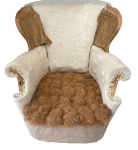
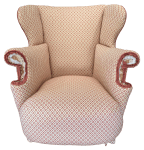
This winged chair was deserving of a new cover plus a new seat. The reasons for the very soft seat were not immediately clear – but clarity arose as work progressed!

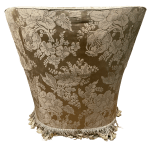
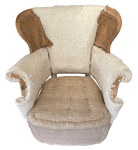
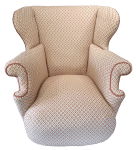
A loose cover was removed revealing the original fixed cover.
The cushion was removed – a new pad will be used with the new cover.

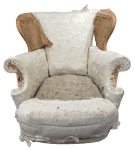
The original cover had a very complex design – particularly the seat cover. A simpler assembly will be used for the new cover.
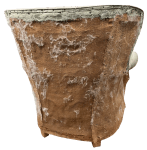
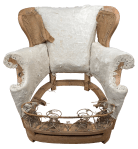
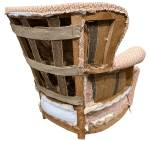
The chair was turned on its back and the undercover removed.
The jute webbing, applied in a lopsided way, was damaged and will need replacing.
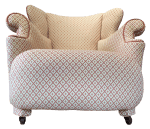
The leg coverings, castors and other fixings were removed.
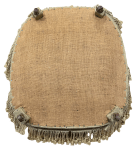
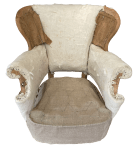
The chair was turned upright and the fringe removed.


The arm covers were removed allowing the cover fabric of the back to be taken off.
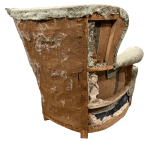
The hessian support cloth was made of three pieces, was weakened with age and needed replacing.

The side panels and then the centre panel were removed.
Working from the back, the inner back fabric was freed. The inner wing fabric was also freed along with the support hessian.

At the front, the stuffings of the wings were removed as well as the cover fabric.


The cover fabric for the arms was removed and then the inner back fabric. The stuffings were left in place.
The final piece to be removed was the fabric assembly of the seat and seat front.

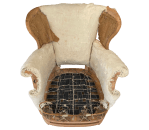
Making a new seat started by turning the seat on its back again and removing the old skewed webbing.
The old springs of the seat were very soft – the cause of the overly soft seat. They will be replaced.
The wadding covering the main seat was lifted away. Then the wadding covering the seat front.


The layers of stuffings over the spring bed were clipped free and taken off.
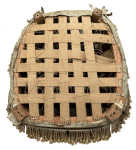
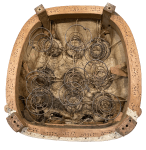
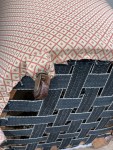
The spring hessian was in two sections. One piece covered the smaller front springs, the other covered the larger seat springs.
The main seat hessian was removed along with the weak springs.
The hessian at the front was then taken off. The front springs and cane were in good condition and were left in place.

New cotton webbing was attached and new springs fixed on. Laid cord was used to tie the springs in their centres and tops.

Some writing was seen on the back frame – F. Butler, 18 Grafton Lane, London W1 (more precisely W1T 5JG and was a light industrial unit until recently).
The date of 2/12/54 (or maybe 21/2/54) tells us this chair was made 70 years ago.
The front springs also had some damaged ties replaced. A new hessian cover was attached over the top of the springs and then tied to the springs. The hessian was stitched to the front cane – the twine wrapped around the cane.
Coir was tied to the hessian, teased out to form an even mat and covered in another layer of hessian. A line of blind stitches pulled the coir towards the front, followed by long through stitches creating a firm rolled front edge. Through ties were added between the two hessian layers to create a firm mat over the seat.


The support hessian for the inner arms was tightened. The thin inner arm stuffings were carefully released, new hair added and then rebuilt with barrier cloth added. This swelled the inner arms.

A layer of hair was added over the seat and around the front and covered in barrier cloth before the cover fabric was added over the seat.
Two short stitched seams in the single piece of fabric allowed the fabric to fit to the shape of the seat instead of the very complicated original approach.
Fabric was then added to the inner back, followed by the inner arms. The arm fabric pieces were lengthened compared to the original to wrap around the lower front, rounded piece of arm frame.
At the back, the old webbing was given some new support, gently pushing the back inwards to give the back a firmer feel.
Hessian support was wrapped around the entire back and piping was attached around the edge of the back, finishing just behind the arms.
Barrier cloth and then the cover fabric was added.
The back fabric was secured under the frame. Then each of the very short legs were wrapped and the original castors put back in place.
An undercloth was added to complete the base of the chair.
Piping was added around the arm fronts, then wadding and barrier cloth.
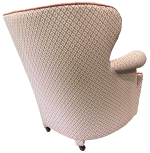
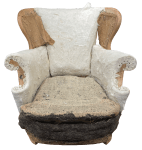
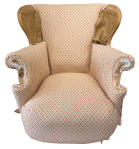
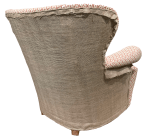
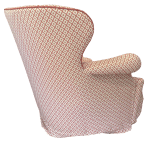
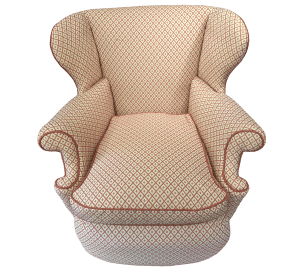
Cover fabric was added completing the work on the chair. The new cover left the castors exposed – rather than sitting behind a fabric skirt.

However, from the more usual perspective when you are standing near the chair, the castors are not really noticeable.
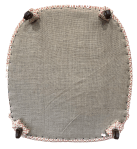
A new cushion cover was made up. The old cushion pad was added temporarily – a new pad to be added after these pictures were taken.
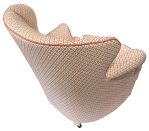
With the cushion in place, the project was complete.
JBerryUpholstery has many examples of furniture Recovering and Restoration and also Soft Furnishings to add to or complement the finished items. You can see pictures of these in the Galleries – Recovering Gallery, Restoration Gallery, Soft Furnishings Gallery and Transformations.
If you have some upholstery that is in need of a bit of TLC or you are interested in Soft Furnishings then please contact us.