

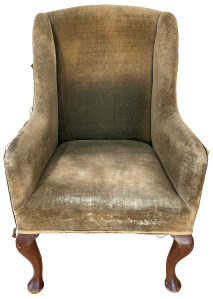
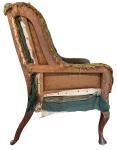
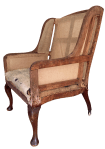
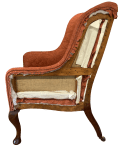
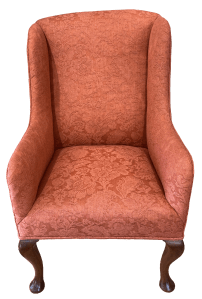
This attractively shaped Winged Chair, possibly Edwardian, had seen a lot of use. While a new cover was wanted, the stuffings appeared very thin and would need attention.
It was noted that braid was attached across the front – and will be replaced with double piping. Braid also edged the arms and wings – that will be replaced with single piping and extended across the back too.
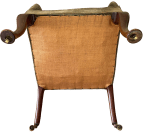
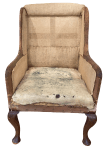
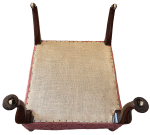
The chair was tipped on its back and the old undercloth removed. The webbing was sagging and would need replacing later in the project.

The back fabric was removed, under which was some rather limp and fragile support cloth. With that taken off, old hessian cloth, with some tears and no longer supported by a piece of webbing was discovered.

At this point it was clear the support cloths would need to be replaced, entailing the removal of the back stuffings.
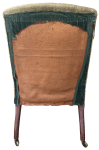
Attention turned to the sides and the same discoveries were made with the old hessian covers simply disintegrating with age.
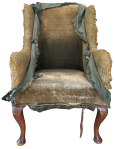
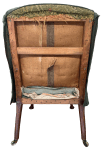
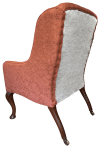
With the outside stripped, the fabric covering the inside fabric was removed – well, one layer! A second older layer of fabric was found underneath.

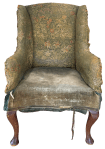
The second layer of fabric was removed from the inner back and arms and the seat cleared of fabric.

While the seat appeared in a mess, it had been rebuilt in the intervening years and would simply have a new cover added.
The fixings for the under covers and pads of stuffings were removed. The stuffings were carefully lifted off of the old hessian. The hessian fixings could then be tackled and the frame for the back and arms left bare.
New hessian sheets were added to both arms and back.
A separate piece of hessian was added and stuffed to create a lumbar support. This was sewn to the back hessian.
A similar approach was used to create a top roll, also sewn to the back hessian.

Stuffings were added over the back, with it’s additional pads, and the two arms.
Calico covers were added over the stuffings.
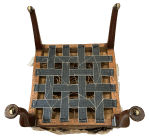

The old webbing was removed and replaced with new cotton webbing and the springs were tied in to it. The tight webbing pushed the springs upward, helping to plump the seat.

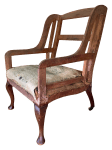
The polish work had suffered some minor abrasions and knocks. The damaged areas were smoothed over, stained with a similar colour to match the colouring and French polished. Wax polish was added and the whole buffed, much improving the appearance of the legs.

Fabric was added to the seat over barrier cloth and secured except at the front sides.
More fabric was added to the inner back and the arms, again over barrier cloth. The seat sides were secured.
The fabric was eased over the sides of the arms, multiple cuts to the fabric allowing it to be eased and stretched to fit.
Single piping was stapled around the edges of the arms, wings and across the back.

New support cloth was added aver the outside arms, wings and back. Then that was covered in barrier cloth.
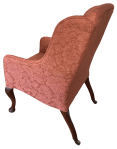
Fabric was then added to the sides, sewn along the piping, and stapled to the underside and back of the frame.
Fabric was added to the outer back, sewn to top and sides, stapled under the frame.
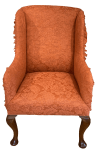
The final touch was to add double piping across the front and around the sides of the front legs, disappearing under the frame.

New undercloth was added over the base, finishing the project.
JBerryUpholstery has many examples of furniture Recovering and Restoration and also Soft Furnishings to add to or complement the finished items. You can see pictures of these in the Galleries – Recovering Gallery, Restoration Gallery, Soft Furnishings Gallery and Transformations.
If you have some upholstery that is in need of a bit of TLC or you are interested in Soft Furnishings then please contact us.
