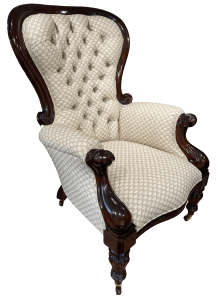
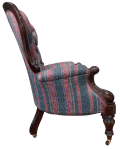
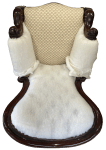
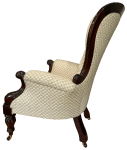
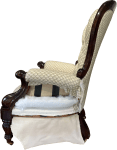
This chair was a reproduction of an elegant Victorian chair.
It was a partner piece for the ‘Buttoned Stool’.
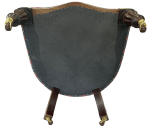
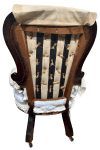
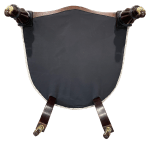
First step was to remove the undercloth revealing the polypropylene webbing.
The opportunity was taken to remove the staples holding the lower edges of the outer arm and outer back.
The chair was stood up and the braid trim around the back and outer arm was removed. The arm fabric was stapled at the front and slip stitched at the back to the outer back cover. The top edge was held under a polyester undercover by back tack strip. Once freed the fabric was removed.
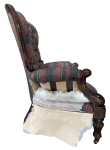
The polyester and support calico underneath were freed around three edges but left attached along their bottom edges as they will be reused. The other side was stripped in the same way.
The opportunity was taken to remove the staples holding the top and bottom of the inner arms and the sides of the seat fabric.
The outer back fabric was removed, followed by an undercover of polyester wadding. The support fabric of calico was released on both sides but left attached at the top while leaving all the button anchors visible.

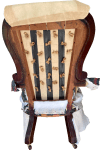
The opportunity was taken to free the bottom of the inner back and back of the seat cover.

The chair was put on its back. The fabric of the inner arms was freed at the front – the last side – and both pieces of fabric pulled free.
The fabric was freed around the sides of the inner back once the braid had been removed. With the button ties cut, the inner back fabric wasremoved.

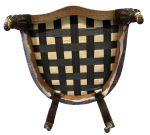
Finally, the braid was removed along the front of the seat and the staples removed. The seat fabric was pulled free. The chair was now ready for it’s new cover.

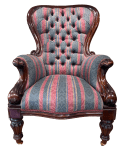
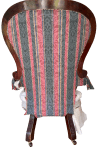
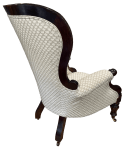
The sequence of adding the new cover was for the most part a reverse of the stripping. First the new seat cover was added.
New polyester wadding was added over the back giving a little more depth to the back stuffings.

The new cover was added to the back as well as the buttoning. The buttons were added starting in the centre and working out, with the pleats folded as progress was made. Pleats also ran out to the frame around the edges. Small rolls of webbing were used to anchor the buttons at the back.
Both arms also had their new covers added.
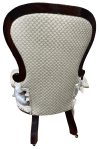
At the back, the original calico support cloth was fixed back in place, then covered with barrier cloth.
The new cover was added, close stapled around the edges and the excess fabric cut off.
At the side, the original saved calico support cloth was put back in place and covered in barrier cloth.

The new outer arm covers were added, held at the top with back tack strip.
With adding the new fabric completed, piping and a bottom cloth were needed to complete the project.
JBerryUpholstery has many examples of furniture Recovering and Restoration and also Soft Furnishings to add to or complement the finished items. You can see pictures of these in the Galleries – Recovering Gallery, Restoration Gallery, Soft Furnishings Gallery and Transformations.
If you have some upholstery that is in need of a bit of TLC or you are interested in Soft Furnishings then please contact us.