

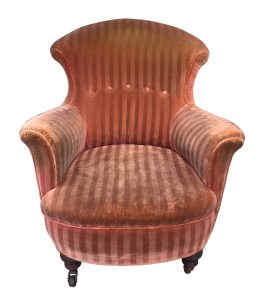
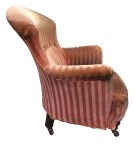
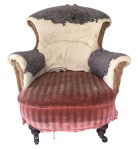
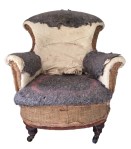
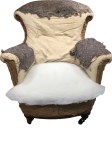
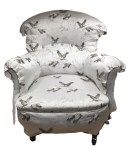
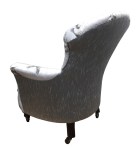
This chair was quite a surprise. There were some indications it was French but it turned out to be a Victorian Iron Back.

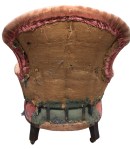
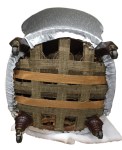
The undercover was removed. The webbing had been worked on several times previously and was OK.
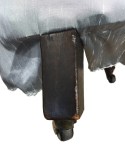
There was a curious collection of bits and pieces under the webbing – does not bode well!
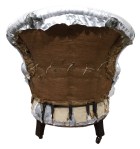
With the fixings removed from around the base the outer covers could be removed.

The outer back and outer arms were covered in a single piece of fabric.
This fabric was freed at the front from the arm front covers, under the arms and continuing up and around the back.
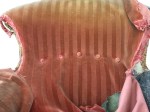
The fabric was removed along with felt padding, leaving the supporting hessian layer.
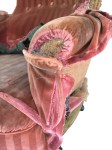
Covers over the fronts of the arms were removed, noting how and where they were secured.
The covers were held with slip stitching and edged with piping. Under them were pads of felt.
The sides of the back were removed. They were constructed in the same way as the arm fronts.
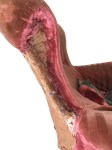
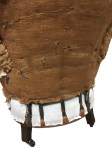
To remove the inner back and inner arms, the fabric around the bottom of the back and sides was freed.

The fabric of these pieces had been cut to pass through the frame and pulled up under the iron frame and slip stitched in place to the hessian.
Slip stitching also held the fabric in place around the entire perimeter of the other edges. All the stitching was removed.
The inner arms and back were attached with machine stitching – so they formed a single piece.
The positions of the buttons and where they were secured at the back were carefully noted before the buttoning cord was snipped and the buttons removed.
Finally the inner fabric could be pulled free – the underlying padding left in place.

The front fabric, with piping sewn on along the top, was slip stitched along it’s upper edge and sides.
This was removed.
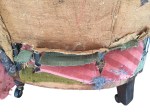
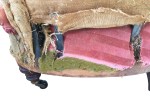
At the sides, the seat fabric was cut around the frame pieces and pulled down (not up like the inner fabric pieces).
At the back, the seat fabric, which must have been too small, had a green extension piece added and that was extended further with twine tacked to the frame. Very creative!
At the front, stitching holding the front of the seat in place was removed.
The seat fabric was then pulled off. The chair ready to be recovered.

The work of recovering begins. The work will be a reversal of the stripping – so starting with the seat,
A new layer of calico was added over the seat.
This layer was used to confirm the cutting needed to pass around the numerous parts of the iron frame at the sides and back of the chair.
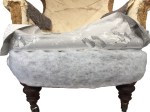
A layer of FR polyester wadding was added and then the cover fabric was positioned.

The sides of the fabric were folded so that they were parallel to the sides of the arms.
The cuts were made and the sides pulled into place.

The same was done at the back. The corners were also cut to complete the fitting.
The front edge was held in place with ladder stitches and then sewn with a back stitch to the stuffings under the front roll.
The seat front, with piping sewn on along the top edge, was slip stitched to the seat fabric, passing through the the underlying stuffings, the ends of the piping tied back to the frame. This was folded up onto the seat.
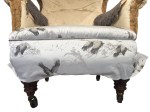
Felt was placed onto the hessian and covered in FR polyester which was sewn to the seat front fabric, stapled to the frame at the bottom and trimmed along the line of the seat frame.
The fabric was pulled back down and secured under the frame. Later this will be trimmed around the legs and finished off.

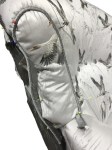
FR polyester wadding was added over inner back and arms and the join sewn closed.
Felt pads were fitted to the front of the arms and sides of the back. The wadding was pulled over and sewn closed to hold the pads in place.
Edges around the seat were simply pushed into place.
Three pieces of fabric were sewn together so that the seams ran around the back of the arms then down to the base.
The whole piece was placed over the seat, pulled to the sides and over to the back and held in place with hand stitching.
Buttons were added, following the shape of the back with all the button twine passing around the horizontal iron frame member.
The fabric was also pulled down to the frame at the sides and back and stapled.
The sides of the seat front were secured, cutting in over the top of the legs.
Piping was machine sewn to the inside edge of all the four pad covers.

The arm front cover was initially pinned in place and then attached following the stuffing line with hand stitching. The ends of the piping were hidden under the base.
The same scheme was followed for the sides of the back, again fixed with hand stitching and hiding the ends of the piping behind the back.
The back was tidied up and then covered in FR polyester wadding.
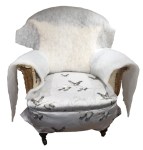
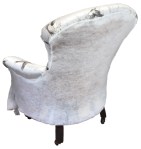
A single piece of a complementary fabric was placed over the back, slip stitching across the top and sides of the back, along under the arms and down the sides of the arm fronts.
The fabric was kept under tension at all times so that the fabric followed the gentle curves of the chair.
The bottom edge of the back fabric was stapled under the frame and cut in around the two back legs.
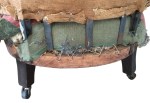
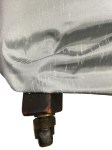
Finally, with the chair turned over, fabric was trimmed around the base.

An undercloth was tacked to the under frame to complete the project.
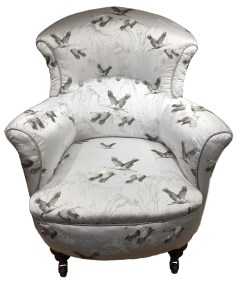
Ready to return to the customer.
This is the third overstuffed chair featured in our Transformations.
JBerryUpholstery has many examples of furniture Recovering and Restoration and also Soft Furnishings to add to or complement the finished items. You can see pictures of these in the Galleries– Recovering Gallery, Restoration Gallery, Soft Furnishings Gallery and Transformations.
If you have some upholstery that is in need of a bit of TLC or you are interested in Soft Furnishings then please contact us.
