

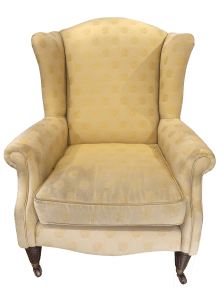
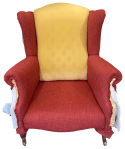
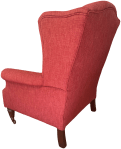
This well built and substantial Laura Ashley Chair just had a grubby cover to replace.
The construction of this modern chair, while nothing like a traditional chair, still leant itself to having a new cover.
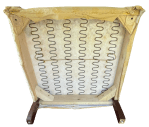
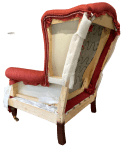
First, the seat cushion was removed and the chair tipped on its back, the front legs unscrewed and the under cloth removed – exposing the fixings for the cover fabric.

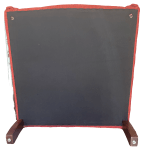
The outer back fabric was then removed. The fixings for fabric wrapped around from the top and sides, as well as emerging through gaps in the frame sides, were also removed.
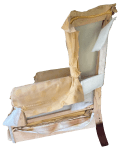
The fabric for the outer arm was removed. That allowed the outer wing fabric to be removed as well.
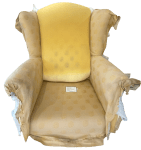
At the front, the arm fronts holding the inner and outer arms were removed.
The inner back fabric was then pulled away – all fixings having been removed earlier.
The last fixings for the inner arms were taken out and those two pieces – that were sewn together – were pulled off.
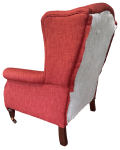
The recovering could now be started, reversing the sequence. The front legs were screwed back into place to keep the chair level.

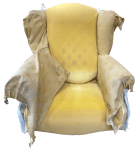
The first piece of fabric was added to the seat, fixed in place except for the front corners.
Next the inner arm and wing pieces – already sewn together were put in place and secured.

The inner back was added – completing the inside.

At the side, piping was added around the wing. Then support hessian and barrier cloth were added before the cover fabric was secured.
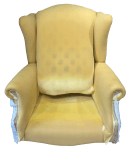
For the outer arms, the cover fabric, barrier cloth and support fabric were added under the arm and across the bottom of the wing, before being pulled down and secured.

The arm fronts were cleared of the old fabric, before the cover fabric was added and fringed with piping.
These were knocked into place on the arms before the seat corners were finished.
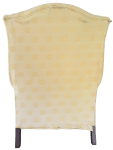
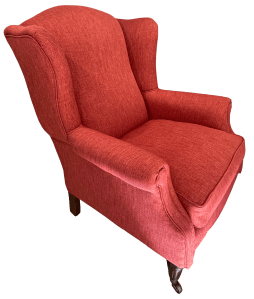
Piping was added to the top and sides of the back. The covers were then added.
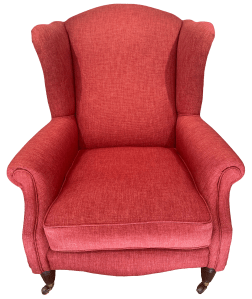
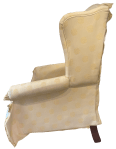
To complete the recovering, an under cloth was added.
JBerryUpholstery has many examples of furniture Recovering and Restoration and also Soft Furnishings to add to or complement the finished items. You can see pictures of these in the Galleries – Recovering Gallery, Restoration Gallery, Soft Furnishings Gallery and Transformations.
If you have some upholstery that is in need of a bit of TLC or you are interested in Soft Furnishings then please contact us.
