

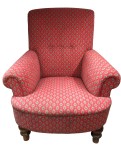
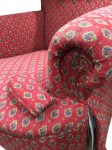
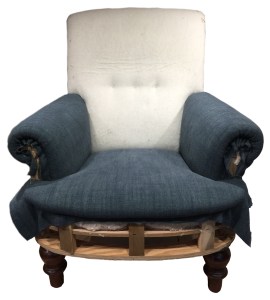
While this chair had slightly worn fabric, it was to be used in a differently styled room – so a new cover was needed.

First, the undercloth was removed. All the visible staples holding fabric under the frame were removed too.
These fixings held the front, back and arm covers. So by removing them when first seen it lessens repeat visits to the same parts of the chair.
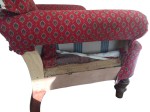
Looking at what is under a chair also gives clues as to age – recent in this case, with the use of elastic webbing. And everything looks to be in almost pristine condition – so this really will be a Recovering project, not a Restoration project!
The sides of the outer back were held in place with flexi-grip – a metal strip with grippers that is stapled on, fabric hooked over and hammered shut. Way faster than traditional slip stitching – so good for reducing production costs.
The cover fabric was pulled free and all staples and the flexi-grip removed.
The underlayer was also freed, then the hessian scrim support.
With the scrim pulled back, back tack strip that held all these layers in place, was removed and then the fabric layers.
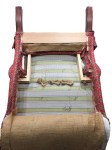
The nailed on outer sides of the back were eased off. The construction was ply, covered with wadding, fabric and trimmed with piping.
This is another “make it quick” method with the entire side separately assembled on a ply base and simply nailed on.
The piping was removed and then the fabric. The ply panels and wadding, resplendent with nails, were put to one side to be reused.
Slip stitching held the front arm covers to the outer arm covers and this was removed.
The arm fronts, with a similar construction to the outer sides, were eased off and fabric and piping removed.

The outer sides were removed – first freeing the outer cover, the under layer and finally the scrim.
The fixings at the top under the arm roll was the same as for the back and all pieces were removed.
The fixings that were revealed were removed, freeing the inner arm and seat fabric.
Progress appeared slow but most fixings had now been removed.
At the back, fabric was freed along the bottom frame and at the sides of the box structures behind the arms.

The cord holding on the buttons was cut and off they came.
Finally, the fabric was pulled off of the inner back.

The nailing above the front legs was removed, freeing the front cover, although it remained fixed on the upper side.
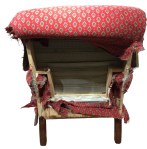
The fabric and under layer of the seat front was pulled up revealing a back tack strip.
With fixings removed, the fabric, with piping trim attached, plus under layer was pulled away.
The fixings along the edge of the seat were removed and the seat fabric taken off.

The arm fabric was freed, this time from inside the box structure at the back.
The front of the arm fabric was held in place below the line of the seat top – the seat will have been put in place after the arms were covered when the chair was first made.
To avoid having to remove the whole seat, the card front was removed giving adequate access.
The fixings could then be removed and the fabric pulled away.

Some work was needed on the legs which had suffered slight damage to the finish.
With all fabric removed this was the ideal time.
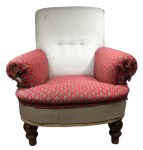
The woodwork was rubbed down with wire wool and new stain applied. The request by the owner was not to have a highly polished finish, so just a little wax polish was added and they were then simply buffed to ensure a clean finish.
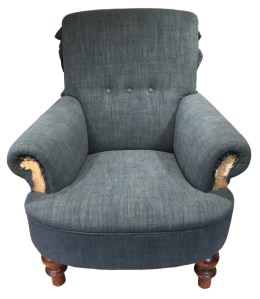
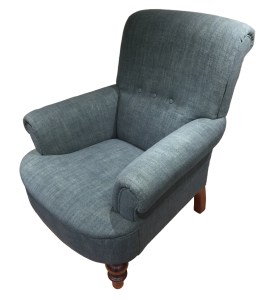
Adding the new cover was just the reverse of taking off the old.
First step was to add new inner arm covers – stapled on all sides with the front edges secured all the way down below the seat.
The seat was added next, cut in at the back and beside the arm fronts.
The front and side extensions were added carefully so that the fabric went straight across the seat – not pulled as the width of fabric reduced.
The card cover was replaced on the seat front along with the padding.
New fabric, with piping already attached, was then added. The top was secured first, then the fabric pulled down and secured under the seat and to the sides, ending just behind the arm fronts.
The fixings to the sides will be covered by the outer arm fabric.
The inner back was added next, cut in at the lower corners and behind the arms. All sides were secured – the top edge pulled over and fixed behind the back.
The three buttons were prepared and held in with nylon buttoning twine, secured to the webbing at the back.

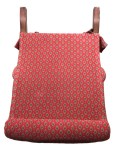
The little covers for arm fronts and sides of the back – the essential interface between front and back – had been retained with just the original cover fabric and trim removed.
The ply base, with nails still in place, with the nail heads covered in card and then padding, were covered in the new fabric which was stapled to the back.
Piping was made up and that was also stapled on at the back, while the piping was pushed down, level with the front.
The completed covers were put back in place – carefully positioning the nails in their original holes before hammering back in, using a protective pad.
No sewing was needed here – compare this to the Overstuffed Tub Chair. Similar structure, different construction!
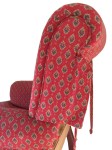
The outer pieces of fabric were now added – the outer arms and outer back.
All were topped by backtrack strip over support hessian, FR polyester wadding and cover fabric.
The layers were pulled down, one by one, and secured by stapling – making sure all of the fixings would be covered and not visible.
The final layer – the cover fabric – was sewn to the arm and back covers.
The outer back was slip stitched down both sides, to the edge of the back covers and outer arms, to complete the covering.
An under cover was added to complete the armchair.
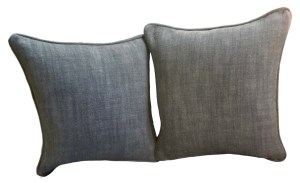
For this project, additional Soft Furnishings accessories were requested – two large throw cushions in the same fabric. Accessories often enhance a project or can be used to tie other items in the room together.
This is another of our featured Transformations and is also a Recovering project.
JBerryUpholstery has many examples of furniture Recovering and Restoration and also Soft Furnishings to add to or complement the finished items. You can see pictures of these in the Galleries– Recovering Gallery, Restoration Gallery, Soft Furnishings Gallery and Transformations.
If you have some upholstery that is in need of a bit of TLC or you are interested in Soft Furnishings then please contact us.
