


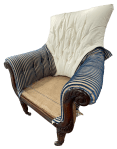
This beautifully restored and cared for Regency Mahogany Library Chair arrived with all internal stuffings in place and new support cloths and webbing.

However, it did need a new cover! The fabric provided was a striped, textured velvet – so, an uneven fabric surface to work with.
The seat cushion was removed. A new piped, shaped box cushion cover will be made.
The first step to recover the chair was to add the inner arm covers.

The fabric was laid over the arm and three buttons added along the arm.
The fabric was then attached at the outside bottom and top of the arm, folding in pleats in line with the buttons.
The fabric was then secured around the arm fronts.

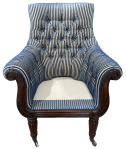
The inner back fabric was laid over the back.

As with the arms, the buttons were added holding the fabric in place and then secured around to the outer back.

Where the inner back fabric met the inner arm fabric, the back was folded back over the arm fabric, with both held in place with the last of the 27 buttons. The fold appearing to be another pleat.

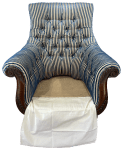
A piece of cover fabric was sewn to some heavy calico. The seam was sewn to the seat base between the arms.

The cover fabric was pulled forward and attached to the front of the frame. The calico was pulled back and secured to the frame, tensioning the fabric.

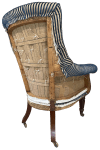
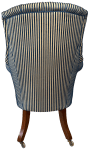
The back of the chair was covered in a hessian support cloth.
A barrier cloth, to ensure conformance to current fire safety legislation, was then added.
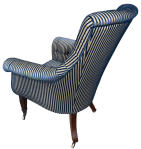
Cover fabric was then attached to the outer arms, fixed to the frame pieces running from the legs to the top corners of the back.
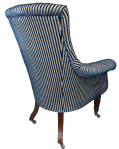
The last back piece was attached at the top and sewn to the arm covers.
Piping was added, starting at the bottom of an outside arm and following the line of the frame pieces to the bottom of the opposing arm. This covered all the raw edges and fixings of the fabric.

The chair was turned over and an under cover tacked into place.
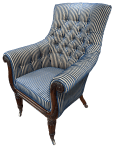
Finally, the newly covered seat cushion was placed onto the chair, as a finishing touch to this really interesting project.

JBerryUpholstery has many examples of furniture Recovering and Restoration and also Soft Furnishings to add to or complement the finished items. You can see pictures of these in the Galleries – Recovering Gallery, Restoration Gallery, Soft Furnishings Gallery and Transformations.
If you have some upholstery that is in need of a bit of TLC or you are interested in Soft Furnishings then please contact us.
