

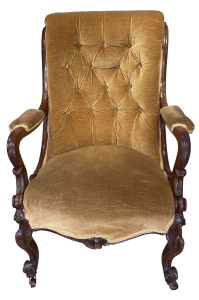
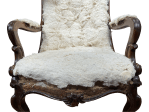
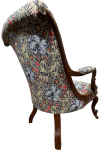
This Victorian chair was of exceptional quality with extra pieces of show wood added compared to the more usual frame. A carefully crafted carving adorned the front. However, the tired cover needed replacing and the seat appeared to slope a little at the back.
The chair was tipped on it’s back and the undercloth and fixings to the cover pieces removed.

The chair was turned around and the fabric removed. This exposed the ties for the fourteen buttons that create the shaping of the front.

These were cut, freeing the front fabric – which was then removed.

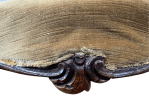
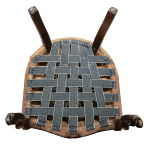
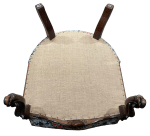
Next the seat was pulled free. At the front, there was an asymmetric carving. It was solidly supported behind – a quite unusual addition.

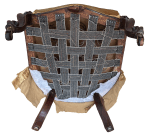
Finally the arm covers were removed. Below them at the side, were some recent additions of pieces of pine, rather crudely nailed to the base. These were removed and will be replaced to allow the seat stuffings to extend to the sides.
The cause of the uneven seat top was broken spring ties. To repair, the old webbing was removed and the springs retied to even up the top of the seat. New webbing was added.
The polish work was refreshed and buffed. New side fillers were added – replacing the original pieces of pine.Ready for the new cover.
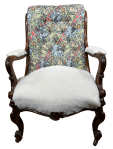
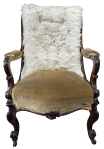
The back was replaced first – rather out of the usual sequence but, with the deep buttoning and pleating, was the most challenging piece of fabric to add.

Next, the seat cover was added, extending sideways over the fillers. The arm covers were the last to be added, keeping the pattern on them the same.

At the back, a hessian support was added, covered with a barrier cloth of polyester wadding.
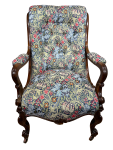
The final cover was added at the top over back tack strip.
It was sewn down the sides and then cut and folded around the legs.
With the cover in place, the chair was turned over and a new under cloth added.
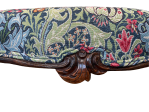
Double piping was added around the back, the arms and around the front of the seat, carefully folded around the carving.
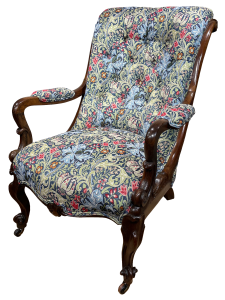
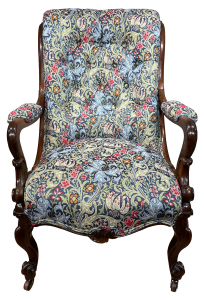
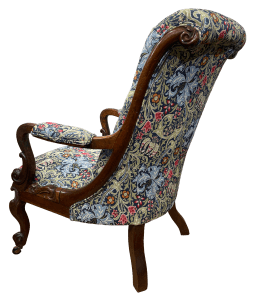
Another completed project!
JBerryUpholstery has many examples of furniture Recovering and Restoration and also Soft Furnishings to add to or complement the finished items. You can see pictures of these in the Galleries – Recovering Gallery, Restoration Gallery, Soft Furnishings Gallery and Transformations.
If you have some upholstery that is in need of a bit of TLC or you are interested in Soft Furnishings then please contact us.
