

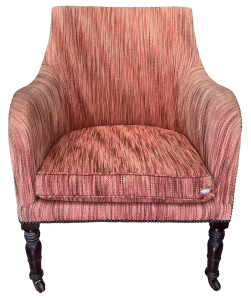
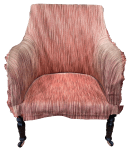
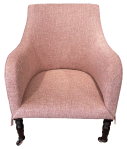
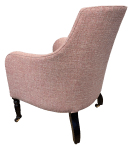
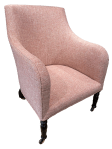
This delightful Victorian Chair had a faded cover that needed to be replaced, with the nailing replaced with piping.
The cushion pad and cover will both be replaced. The polish work of the legs will also be improved.
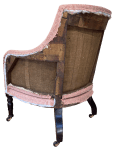
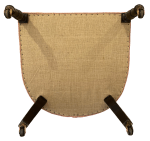
To begin, the cushion was removed and the chair turned on it’s back. Unusually there was no undercloth.
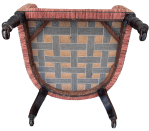
The fixings were removed all around the base, freeing the bottom edge of the outer back.
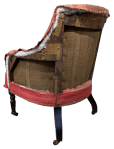

The cover was removed, then the polyester wadding and support cloth. There was an extra line of fabric around the base and this too was removed.

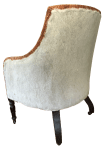
With the chair facing forwards, the fabric of the seat and inner back were removed.
While the chair was stripped some maintenance was carried out. This ‘wet work’ is best done at this point. With the outer layers of fabric removed, access is easier and messy activities – cleaning and polishing – can be completed before the new fabric cover is attached.
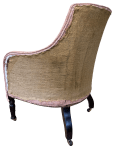
The slightly sagging webbing was tightened. This will keep the seat base flat and a little higher.

The castors were cleaned and polished. The dark tarnish giving way to bright brass.
The legs were also cleaned of old discoloured polish using meths as a solvent. Small, pale, knocks and scratches were stained to match and then wax polished and buffed.
The intent was to reduce the signs of age, not remove them.
With the ‘wet work’ completed the new cover could be added.
Recovering started with adding a new cover to the inner back. Three pieces of fabric were cut out and shaped to fit the back before being sewn together. The combined piece was attached with staples on all sides. To conform to the shape, the fabric was pulled hard to the top and bottom and less vigorously to the sides.

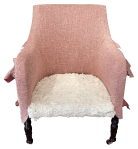
Previously, the seat was only padded with some wool felt which had compressed and become thin. An additional layer was added and that was covered in a barrier cloth to improve the softness of the seat. The seat cover was then added over the top, passing under the sides of the back and secured to the back of the seat base. At the front the fabric was secured under the seat frame.
Piping was stapled around the arms and back. This will divide the inner and outer back covers.

The extra detail of fabric covering the edges of the seat and inner back fabric was added. This seals the join of inner back and seat.
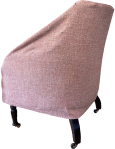
The chair was now ready for the outer back to be added and the newly covered cushion to be put in place.

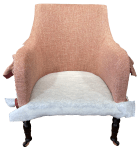
Support hessian was added over the entire outer back which makes the back firmer and protects the cover fabric. Barrier cloth was added to ensure the chair meets current fire safety legislation.
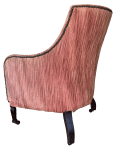
The cover fabric was made of two pieces of fabric sewn together with the seam down the middle of the back. The edges of the fabric were folded and slip stitched to the piping – cutting excess away as progress was made to the front of the arms.
The lower edge was stapled under the frame, cut and folded around the legs.
Double piping was added as a trim around the base with the join at the back wrapped.
An undercloth was tacked into place to complete the recovering work. A new box cover for the seat pad was made, piped and zipped, to complete the project.
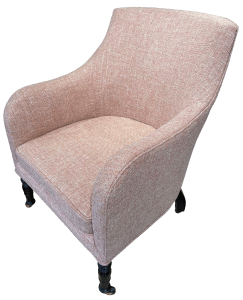
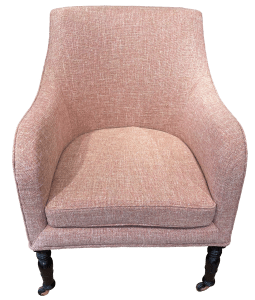
The chair was returned to it’s owner. This project preserved a very attractive Victorian chair and will give many more years of service.
JBerryUpholstery has many examples of furniture Recovering and Restoration and also Soft Furnishings to add to or complement the finished items. You can see pictures of these in the Galleries – Recovering Gallery, Restoration Gallery, Soft Furnishings Gallery and Transformations.
If you have some upholstery that is in need of a bit of TLC or you are interested in Soft Furnishings then please contact us.
