

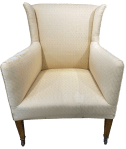
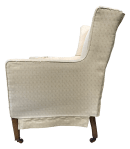
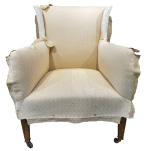
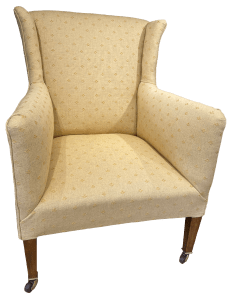
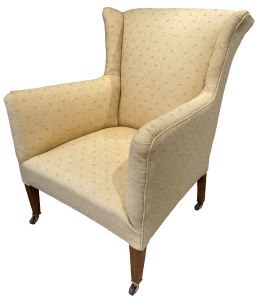
This project was a little unusual in that the intent was to return the chair back to something close to its original appearance. The new fabric was very similar to the original fabric, now faded and worn.
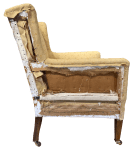
During the work, repairs were made to broken joints, brass castors cleaned and the damage to the legs restored.
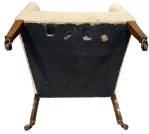
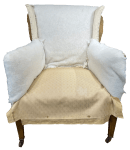
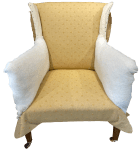
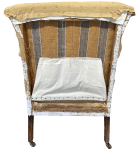
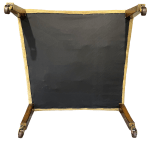
The chair was tipped over and the old undercloth removed. Fixings to the old cover were also removed.
The stitched on back cover was removed, with the piping freed.
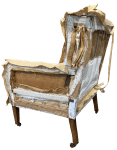
The side covers were next to be removed.
The piping around the edges were also taken off and fixings to some of the inner fabric taken off too.
The remaining fixings to the inner arms and wings were taken off and the loosened fabric pulled free.
The seat fabric fixings had also been removed and so the seat fabric could simply be pulled free.
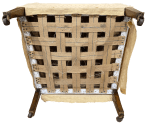
Broken joints of the arms and wings were opened, cleaned and glued.
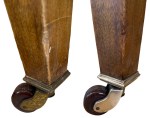
Before the new fabric was added, the brass work of the castors was polished and areas of minor damage to the legs smoothed, stained and polished.
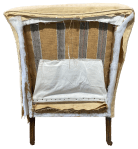
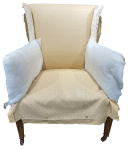
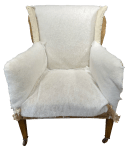
With the wet work complete, the new cover was added – first the seat, then the inner back.
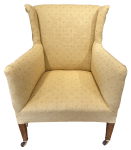
The inner arms were then added and the seat front corners tidied up. The inner wings had their covers added, completing the inside of the chair.
The outside was tidied up, covered in support cloth and then barrier cloth to conform to current fire safety legislation.
Piping was added around the edges of the arms, wings and back.
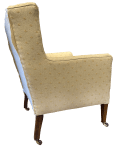
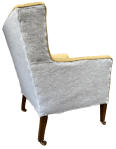
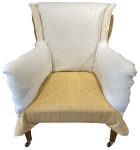
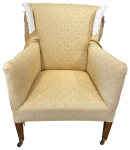
Each of the outer sides – arm plus wing – were covered in a single piece of fabric with no seams. They were stapled, with back tack, along the tops of the arms and hand sewn to the rest of the piping.
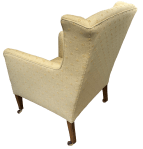
The back fabric was added over back tack strip, sewn down the sides and stapled under the frame.
With all sides attached under the seat, a new undercloth was added to complete the project.
JBerryUpholstery has many examples of furniture Recovering and Restoration and also Soft Furnishings to add to or complement the finished items. You can see pictures of these in the Galleries – Recovering Gallery, Restoration Gallery, Soft Furnishings Gallery and Transformations.
If you have some upholstery that is in need of a bit of TLC or you are interested in Soft Furnishings then please contact us.
