

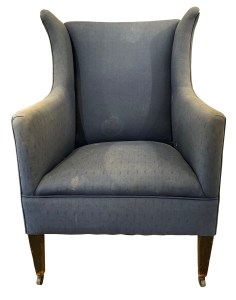
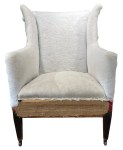
This chair was the first to need a spirit level!
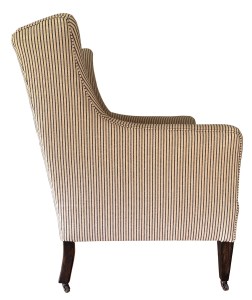
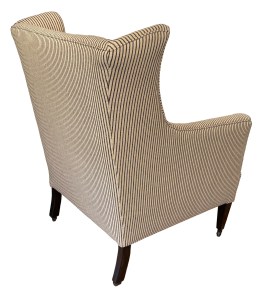
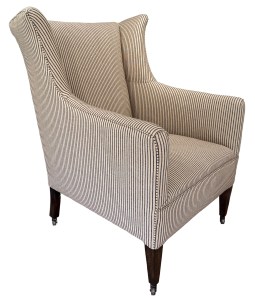
The chair, early 20th century and possibly Edwardian, with interestingly curved wings, needed a new cover.
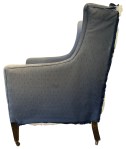
The frame was in good shape. The polish on the legs had a lot of superficial damage and needed work.
First task was to tip the chair up and remove the undercover.
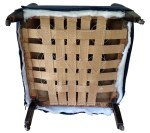
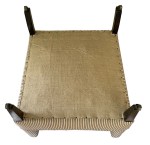
Surprisingly, jute webbing supported a very new set of springs, well tied in with new hessian covering the tops of the springs. Clearly, this chair had been reupholstered fairly recently. The seat though was constructed using traditional methods.

All the fixings to fabric on the outside of the chair were removed before the chair was turned right side up and the back tackled.
The fabric was sewn to the sides with back tack strip holding the fabric to the top.
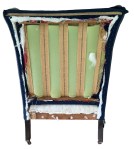
Another surprise, the back stuffings were of new green foam. And the edge of some striped fabric was left peeping out around the edges.
With all fixings removed while the base and back were worked on, only the top and front edges needed to be freed when the chair was turned to the side.
Unusually, there was just a single piece of fabric covering the arm and wing. Typically, the inner arm fabric divides the arm and wing fabric pieces.
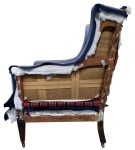
The fabric was sewn on for most of the edge, just the straight front using back tack strip. The fabric and wadding were removed, leaving a traditional style upholstery to the arm and wing with more of the striped fabric visible.
While some signs suggested that this chair might not be Edwardian, a mass of tacks and old webbing at the back confirmed the original idea of age.
Piping ran in a continuous length from the bottom of one arm, up the wing, across the back and down to the bottom of the second one. This was removed.
As all fixings had been removed earlier, the cover of the wings and arms could be pulled free.
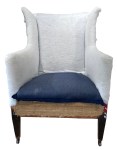
Next the back, the seat front with it’s piping and finally the seat were removed.
With the chair stripped, it is time for ”wet work” to sort out the damaged finish to the legs.
The collage of images follows the sequence of work from start to finish.
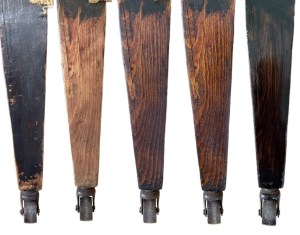
The old polish was scraped off leaving pale, unstained wood.
Stain was applied but took poorly.
Many coats of French polish emphasised the grain and produced a smooth, shiny finish.
French polish was mixed up with some ebonising finish. After some more coats, this resulted in a dark brown finish, similar to the original, with the grain just visible.
The legs were all given a final rub down with wax polish to produce a pleasing sheen to finish the process.
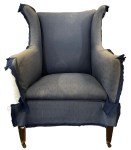
With the ’wet work’ complete, the new cover with a fine striped pattern was added.
While that made pattern matching relatively easy, it was very important to keep the lines straight and vertical – particularly on longer pieces of fabric.

Recovering started with the inside wings and arms. Two pieces of fabric were sewn together, with the lines of the fabric straight.
These were then attached using a spirit level to keep all the lines as vertical as possible from the arms to the wings.
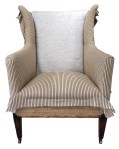
The seat was added next, making sure the lines were straight and symmetrical. Followed by the inner back – again taking particular care to keep lines straight and vertical.

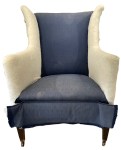
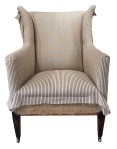
Piping was machine sewn to the top of the seat front and the combined piece added using back tack strip to keep the line straight.
Piping was added all around the edges of arm, wing and back, as per the original. The pattern was matched, as far as possible along the tops of the arms and along the back.
A single piece of fabric was added to each arm.
Because of the pattern of straight lines and the idea of aligning wherever possible to other pieces of fabric, back tack could not be used. So the fabric was sewn on – slip stitched on both sides of the piping. The spirit level was an essential tool! Slow but neat.
Finally the outer back was added, attached to the piping in the same way as the wings and arms.
A slip stitch was used to attach down the outside edges to the wing and arm fabric.
All outer pieces were stapled under the frame and a new undercloth was tacked on to hide the raw edges.
Was the pattern kept vertical and straight on the sides? You decide!
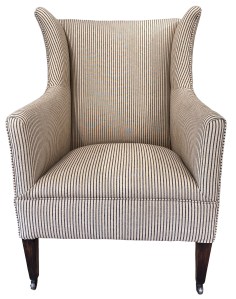
The chair was then returned to the owner.
JBerryUpholstery has many examples of furniture Recovering and Restoration and also Soft Furnishings to add to or complement the finished items. You can see pictures of these in the Galleries– Recovering Gallery, Restoration Gallery, Soft Furnishings Gallery and Transformations.
If you have some upholstery that is in need of a bit of TLC or you are interested in Soft Furnishings then please contact us.
