

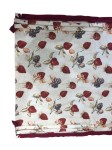
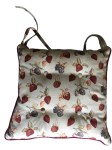
Tie-on cushions are frequently used with kitchen chairs.
These particular examples included four buttons on both sides with the pairs of ties at both back corners. Piping of a complementary colour was made up for the sides.
You can choose the size and finish when you order Tie-On cushions from JBerryUpholstery. Ties can be secured with a bow or Velcro – it’s your choice.
Fabric was cut out for the cover. 2cm was added as a seam allowance and a further 4cm added to the finished size to allow for the pulling in caused by the buttoning and for the curving sides.
The ties were made from 60cm long strips, 5cm wide. The fabric was folded in half, then the edges to the centre, folded and pressed. The ends were folded in hiding the raw edges and the ties top stitched on sides and ends.
The ties were cut in half and the cut ends pinned at the top of the front side of a cover piece.
Piping was pinned over the top of the ties and around three edges of the cover. The last 2cm of the piping was cut back, the cord snipped off and the fabric pulled upwards to the top edge.
The piping was then sewn on around the edges of three sides and stopping where the piping end turned outwards.
The other side of the cover was pinned underneath, good faces together, and the same three sides sewn following the earlier line of stitches.
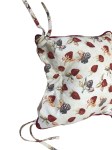
The cover was turned right side out and a fibre pad inserted, taking care to push fibre well into the corners.
The pad was held well back from the opening with pins and the fabric on both sides of the opening folded back by 1cm. The opening was then top stitched closed, the extra space made by the pinning, easing the process.
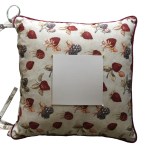
The top and bottom were marked out with pins added by the corners of a centrally placed five inch square template.
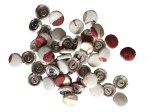
Eight buttons were made up using disks cut from the fabric. These were threaded through using nylon buttoning twine with the pins as markers and a slip knot on one side.
When all four button pairs were in place, the thread was pulled tighter, keeping the same tension for all four positions. The thread was tied off and the ends passed back into the cushion, the protruding ends snipped off.
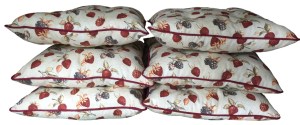
Ready to perch!
JBerryUpholstery has many examples of furniture Recovering and Restoration and also Soft Furnishings to add to or complement the finished items. You can see pictures of these in the Galleries – Recovering Gallery, Restoration Gallery, Soft Furnishings Gallery and Transformations.
If you have some upholstery that is in need of a bit of TLC or you are interested in Soft Furnishings then please contact us.
